Page 1 of 1
1/4 scale T-21 CW
Posted: 15 Jan 2020, 22:13
by SedB
Hi all,
Here's a tread bout my very first build ever, so how much scale this Sedbergh is going to be...!? Anyways, the kit is from Chris Williams, and since I haven't found a tread on a completed T-21 in 1/4th scale, I am using 2 treads as guide. These treads are of the same kit but 1/3.5th scale:
http://forum.scalesoaring.com/forum/aer ... ams-design
http://www.retroplane.net/forum/viewtop ... sc&start=0
Chris Williams has already been of great help, thanks for that!
Since I live on the metric side of the Channel, some stuff will not be a 100% fit to the plan, though with the conversion table I'm using I should(...) be OK.
First thing I had to do was to wait for these:
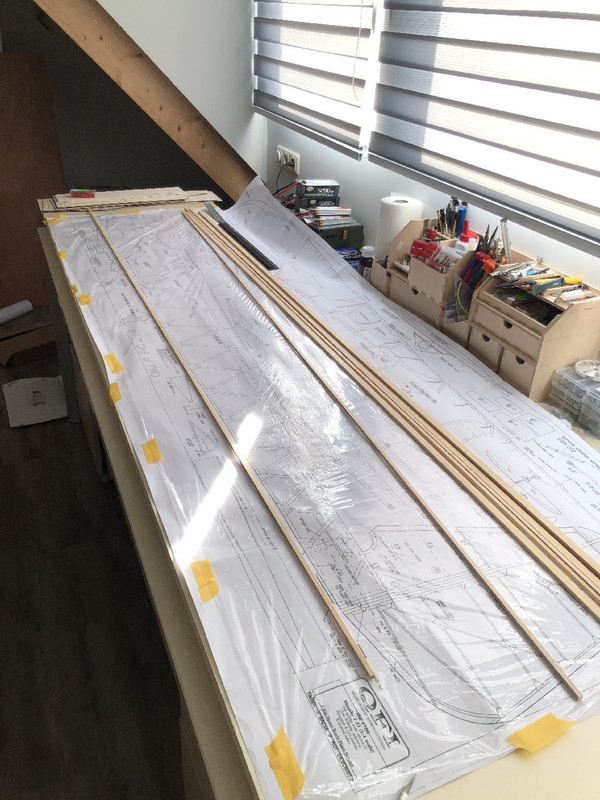
6xx6x2000mm longerons, these are none standard size so they had to be ordered.
And off I went:
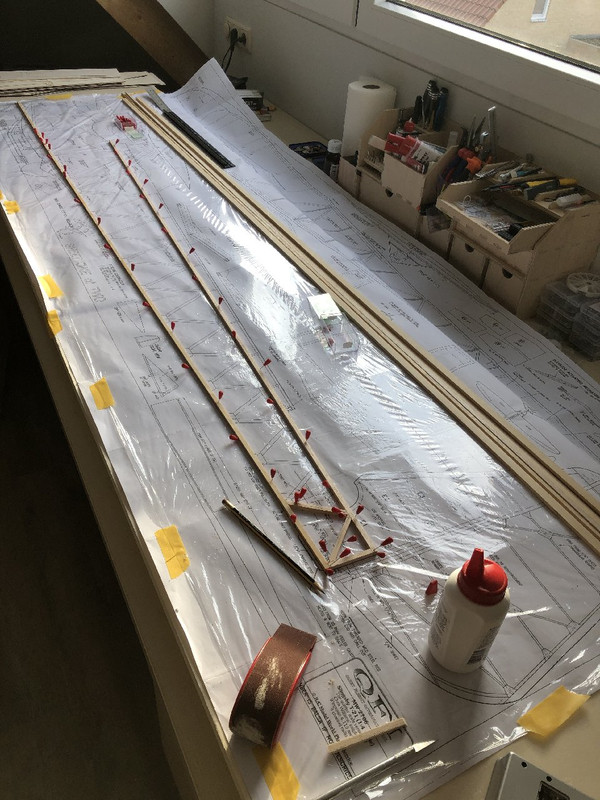
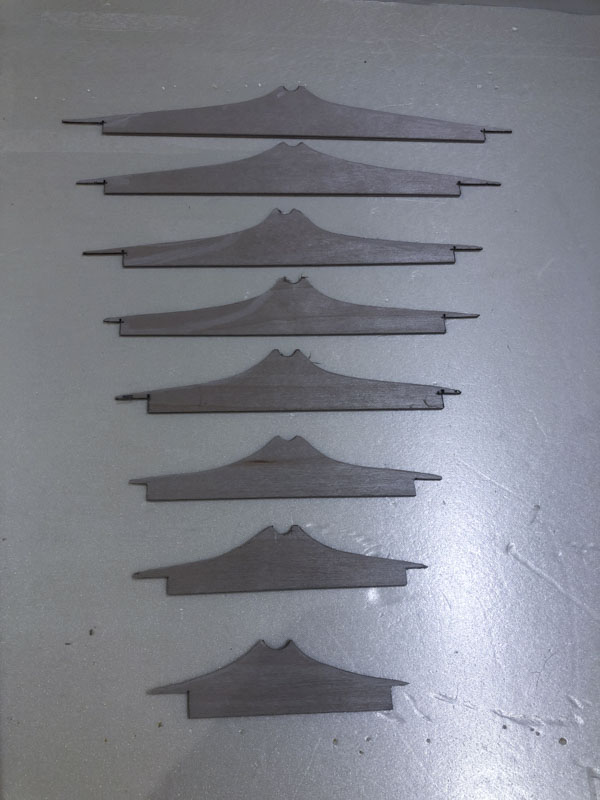
This might be the easiest part of the build, pretty straight forward.
First errors already made, some of the skin plates are the wrong way around. Not a biggy, but need to pay more attention in the future!
That's it for now.
Even though this build is not as high standard as most builds here, I hope it's a welcome tread. Feel free to comment!
Daniel
Re: 1/4 scale T-21 CW
Posted: 18 Jan 2020, 23:47
by SedB
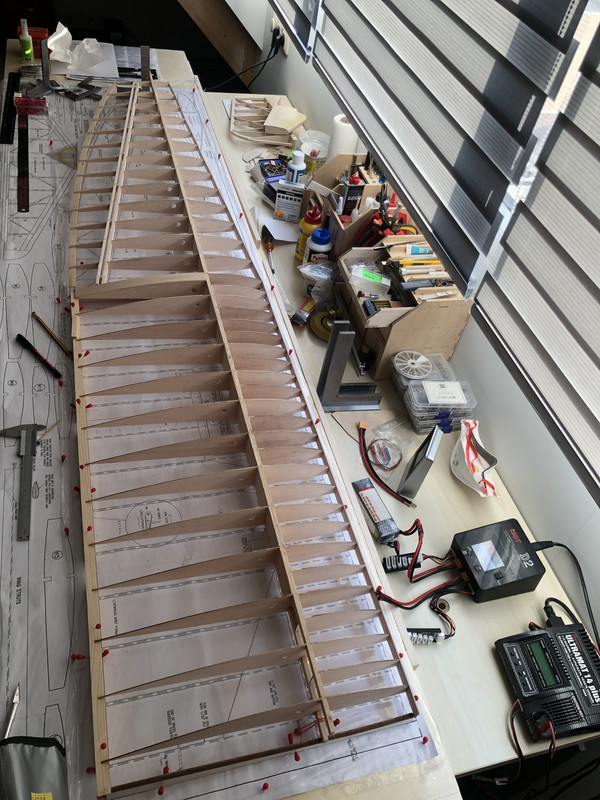
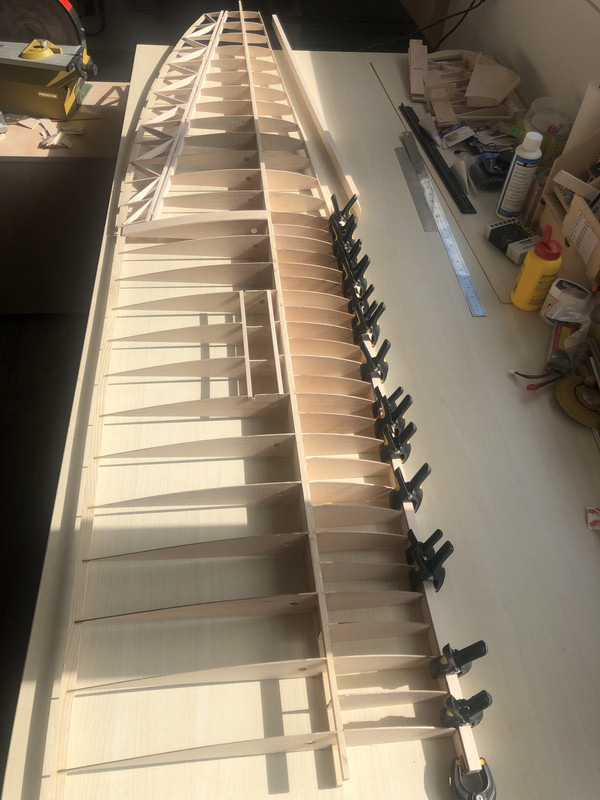
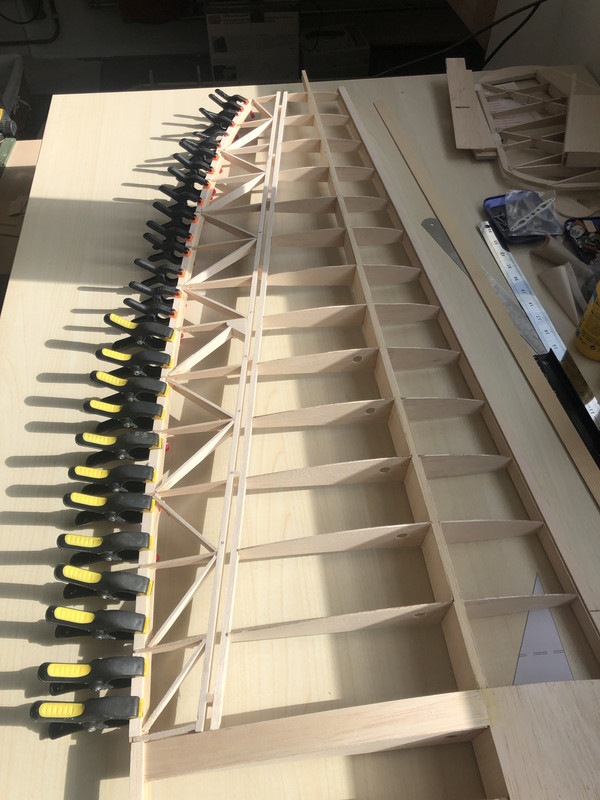
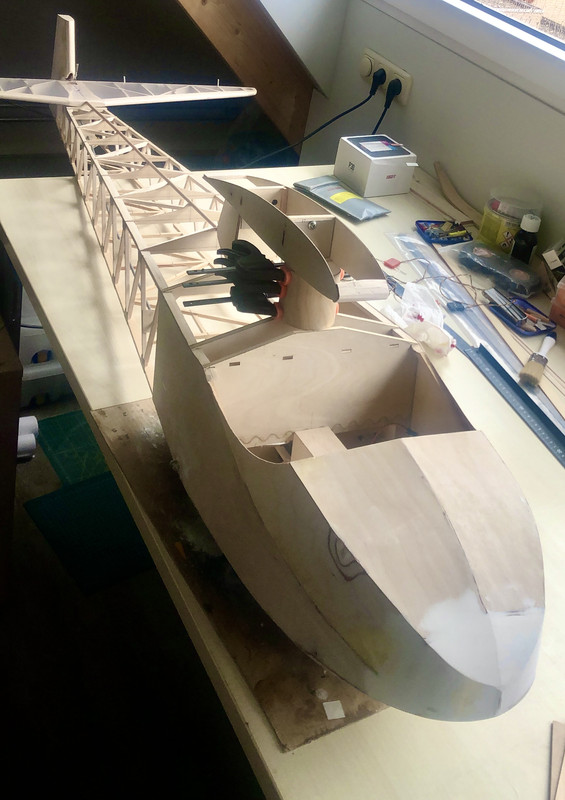
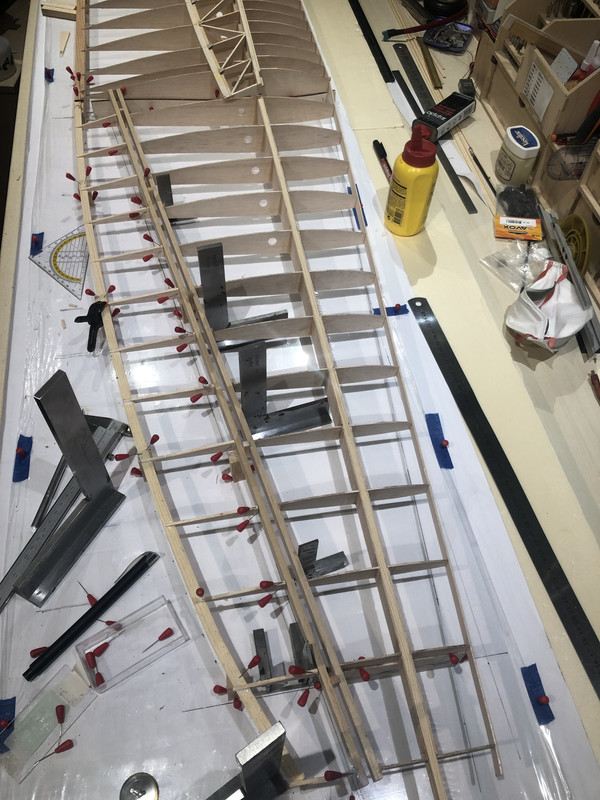
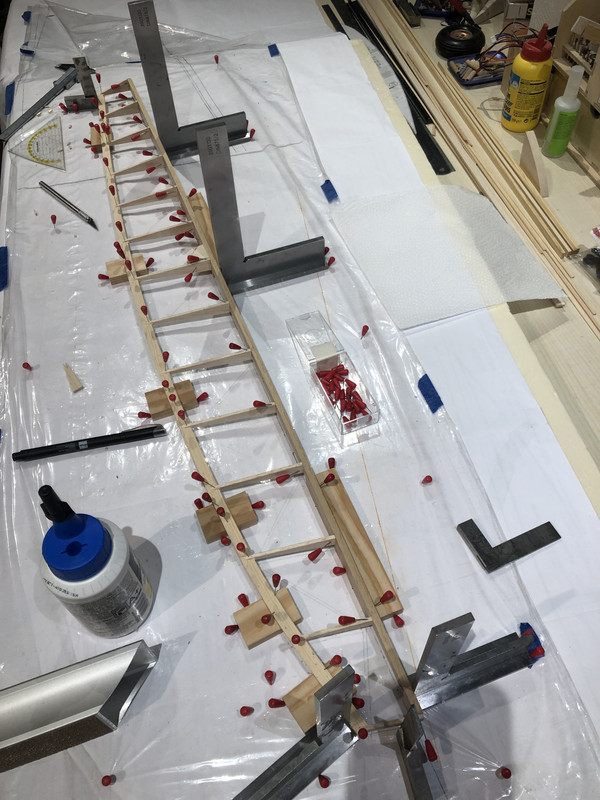
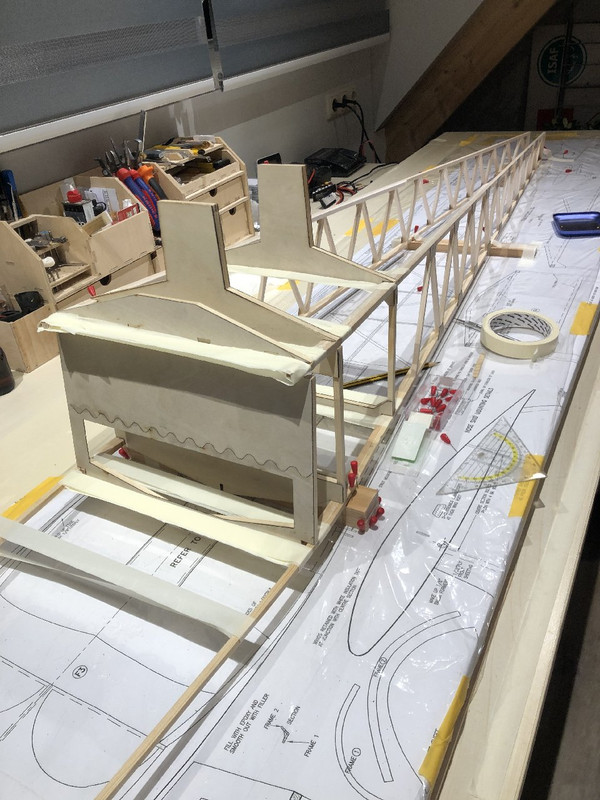
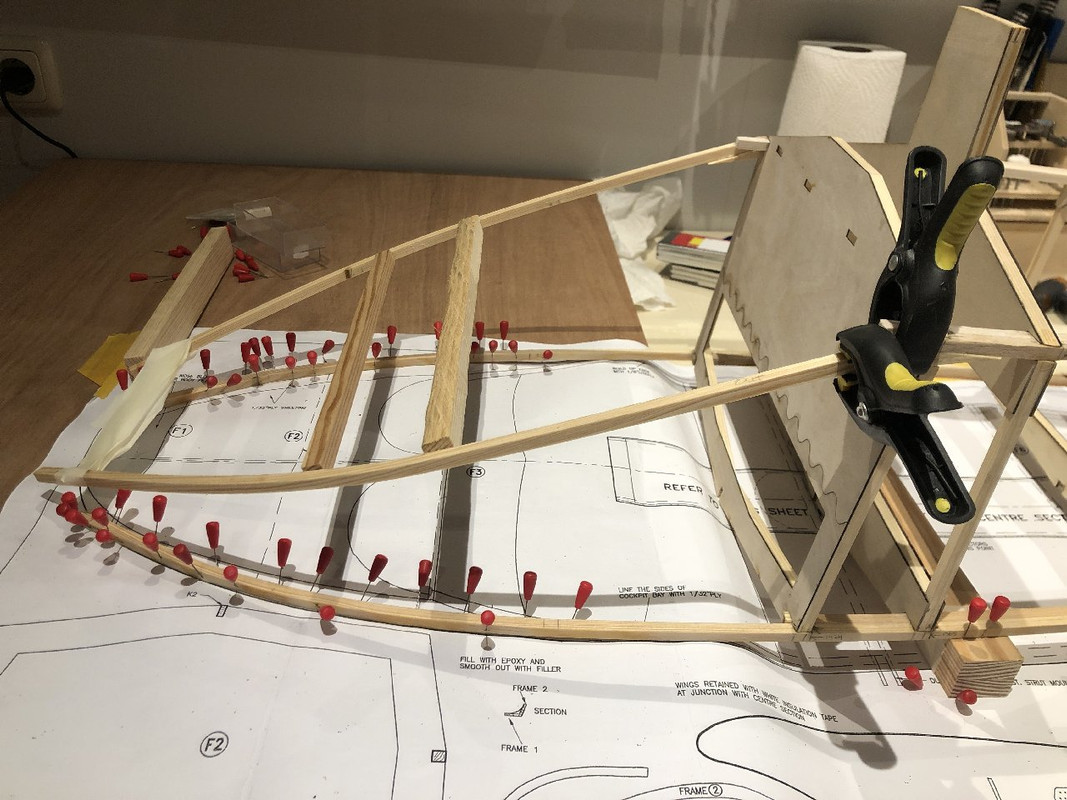
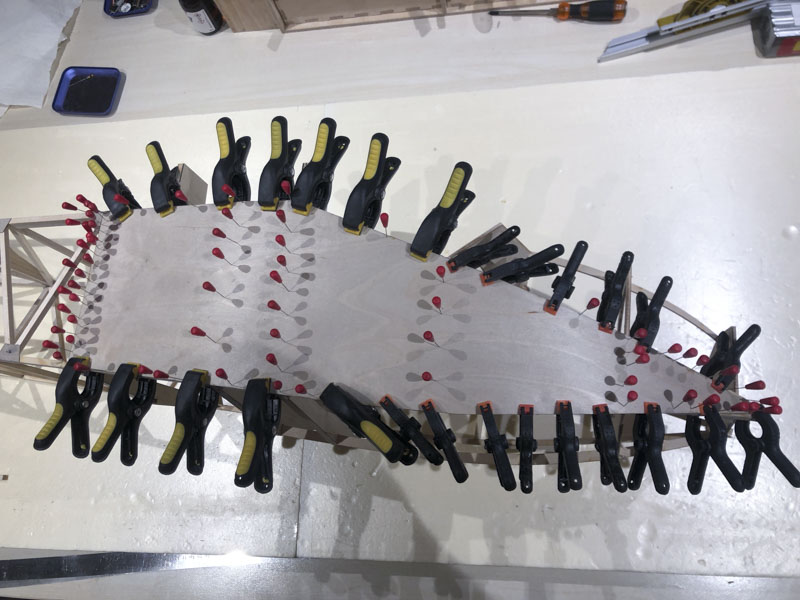
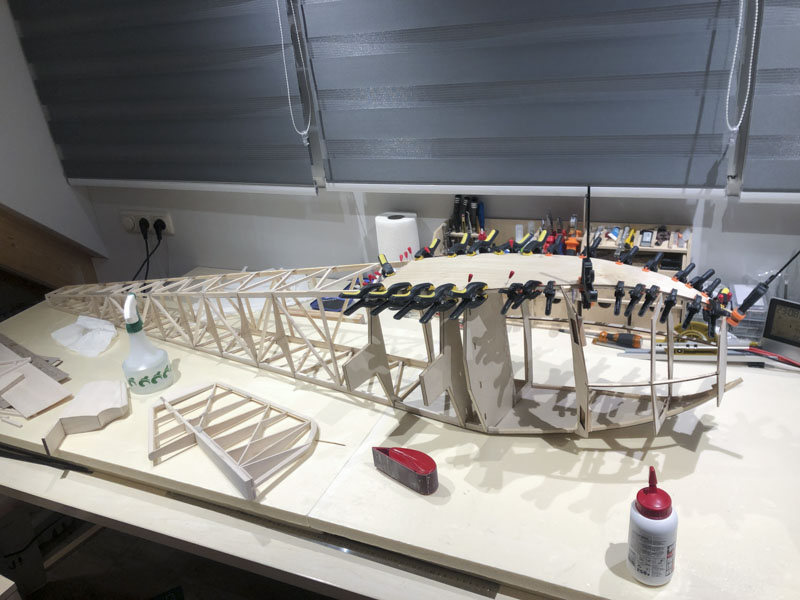
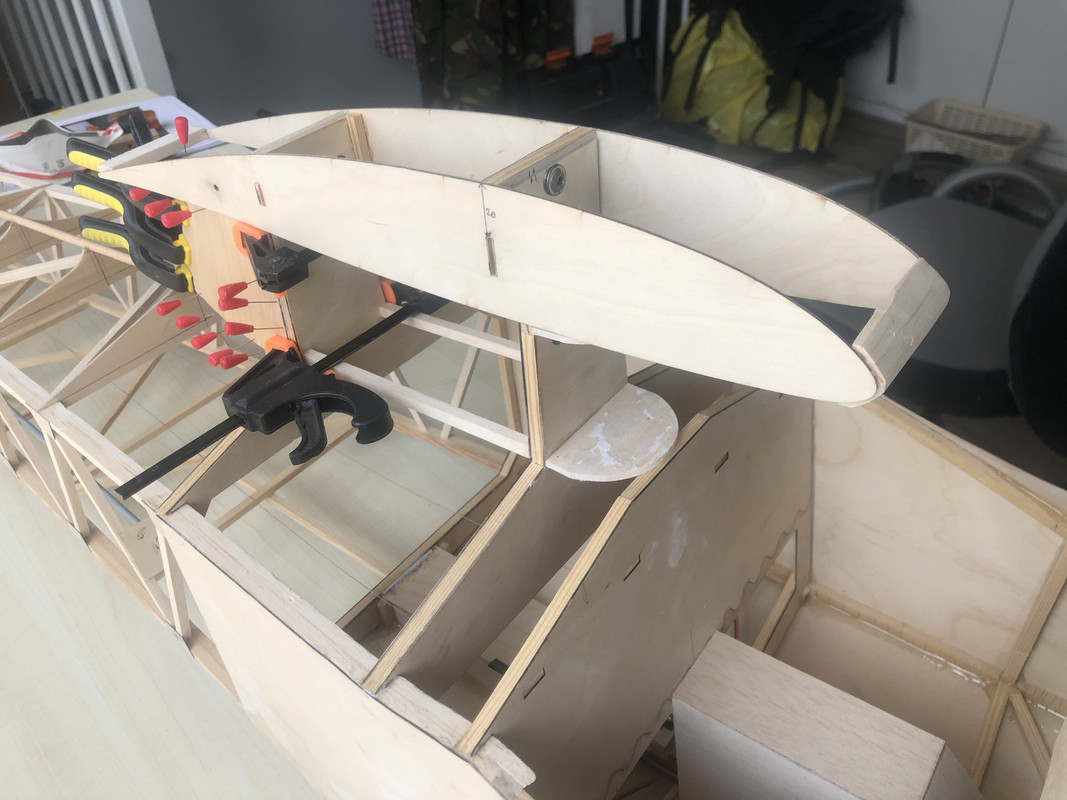
Once the sides were ready, they could be lifted and stuff stared to take shape;
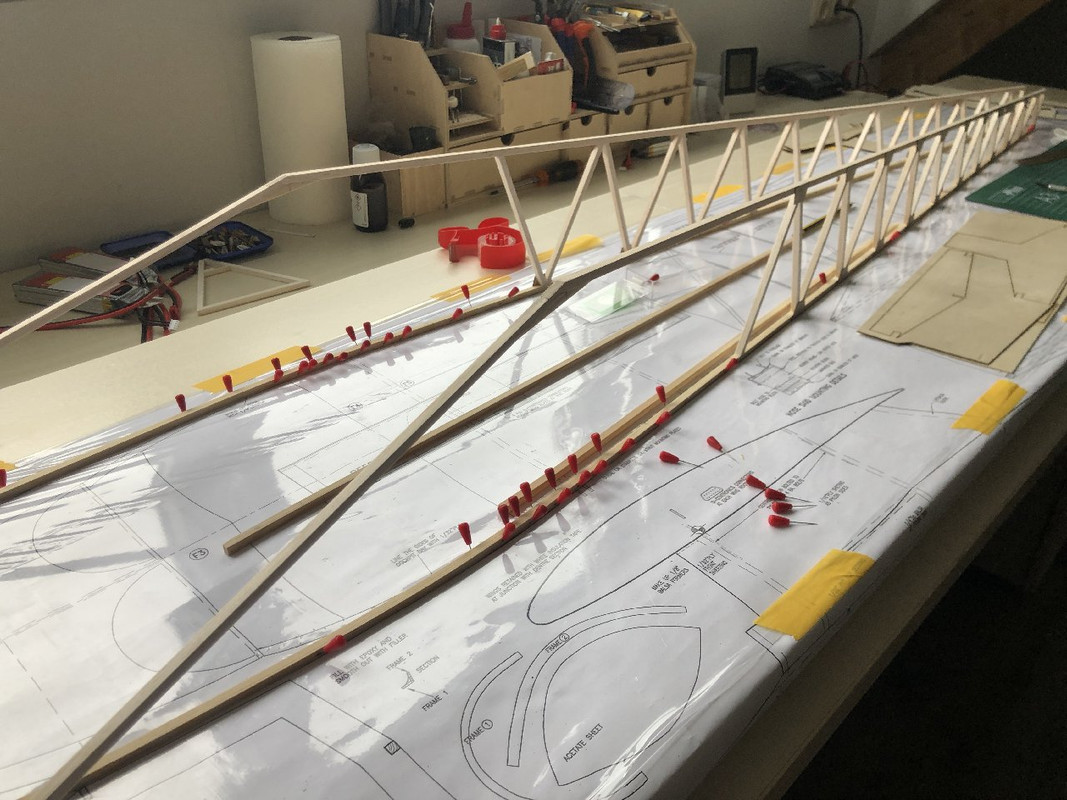
The double longerongs are glued in place with the side standing straight up, guess I could just have flipped the sides without having to pin them to the table..
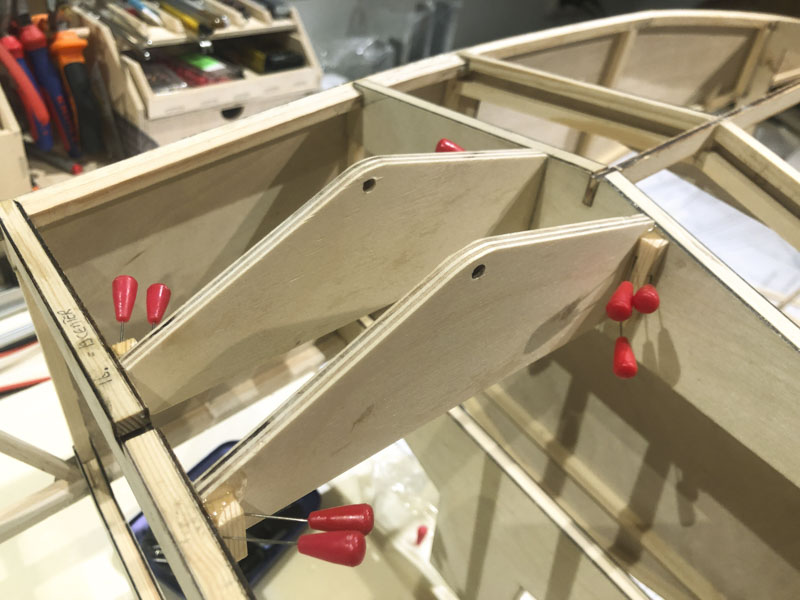
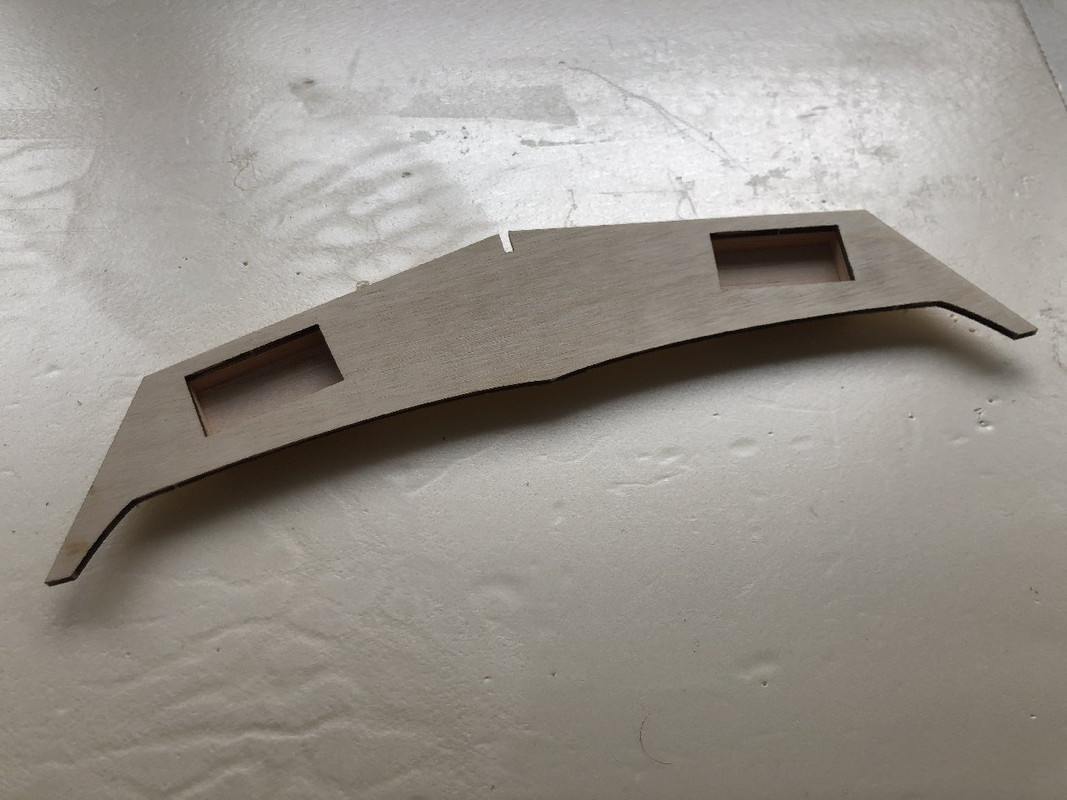
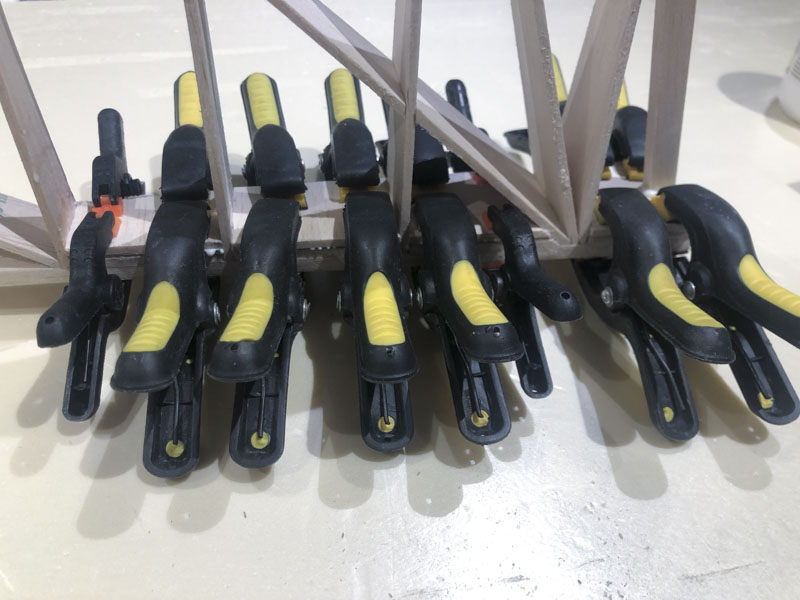
Parts F4, F5 and F6 are the main parts of the whole frame. The kit provides the ply plating for these, though the the actual structure has to be build

The ply top part of both F5 and F6 are not a perfect match with the drawing. I hope I got it all straight, otherwise I might run if to issues much later..
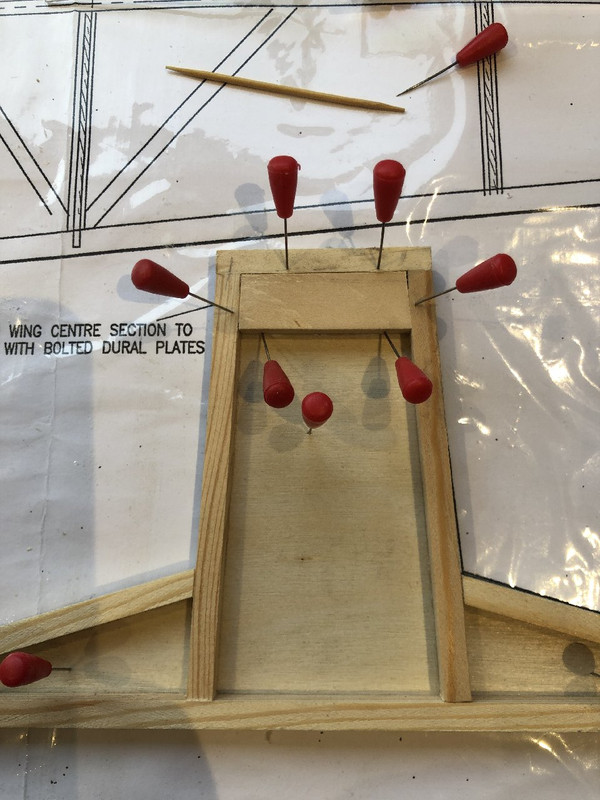
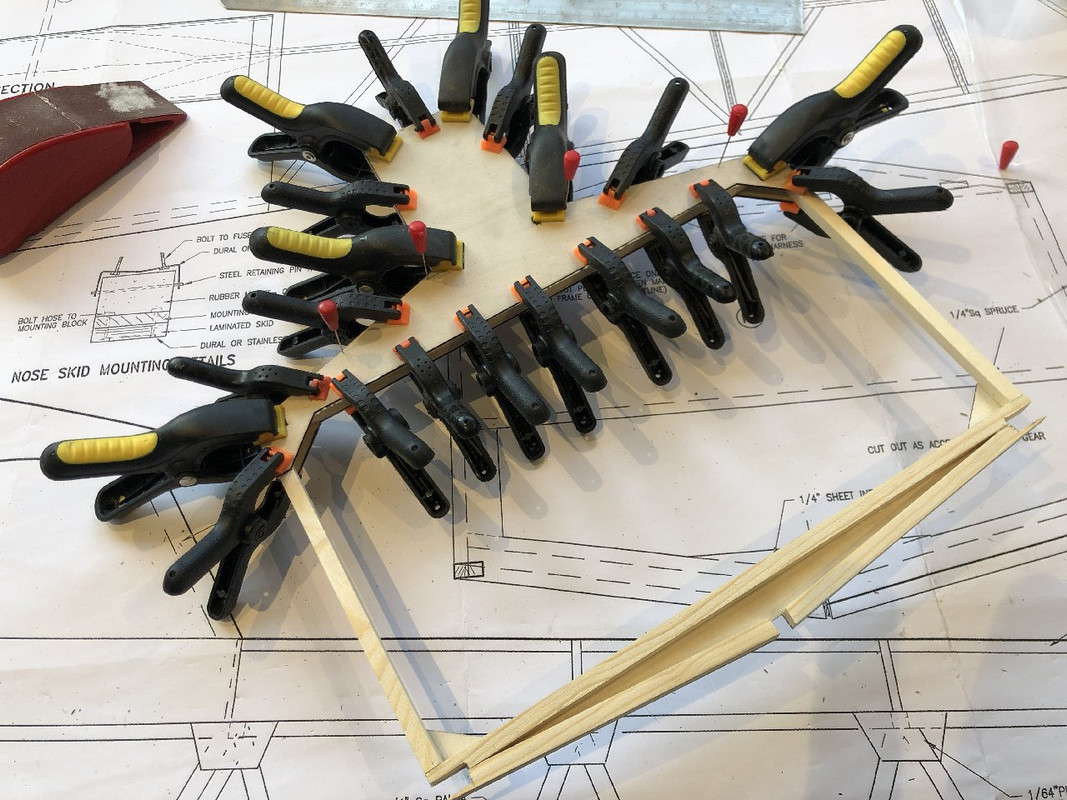
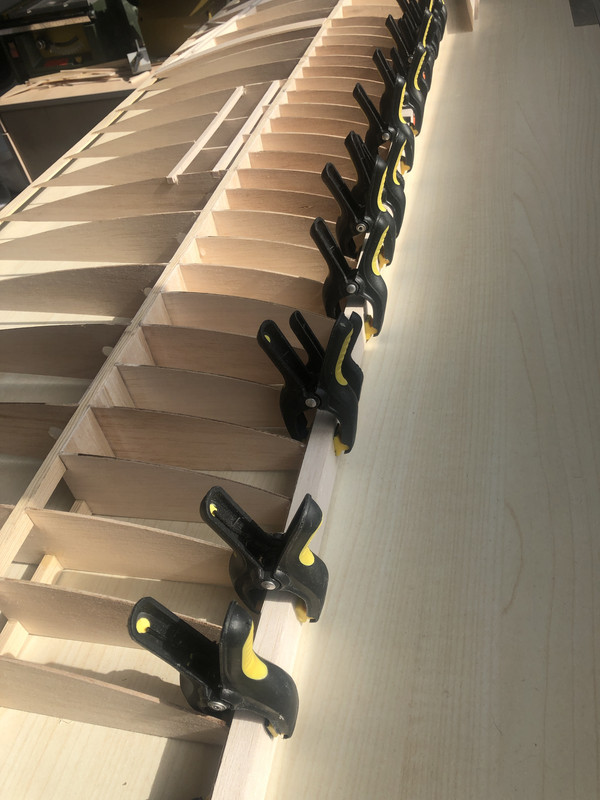
Am I overdoing it with the clamps?

Re: 1/4 scale T-21 CW
Posted: 19 Jan 2020, 09:09
by Cliff Evans
Looking good. Keep the tail end as light as you can.
Re: 1/4 scale T-21 CW
Posted: 23 Jan 2020, 20:29
by SedB
Thank you Cliff, I'll do my best!
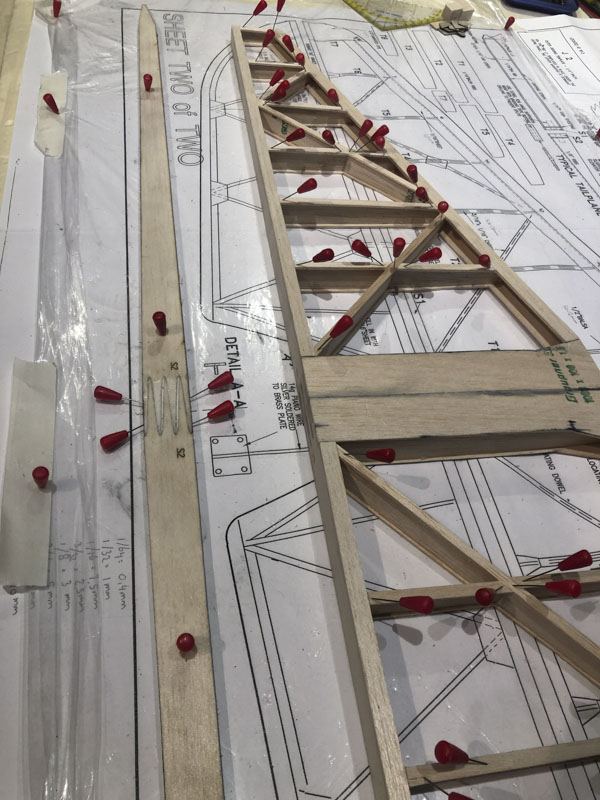
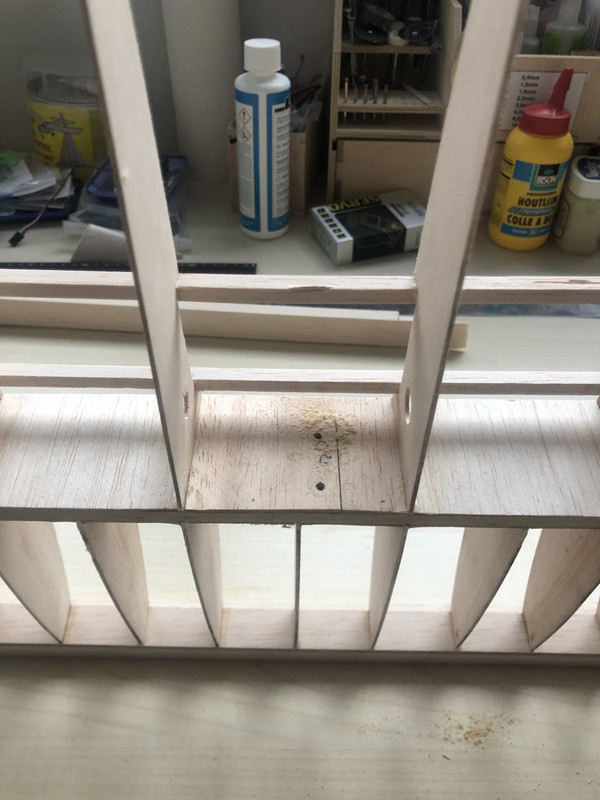
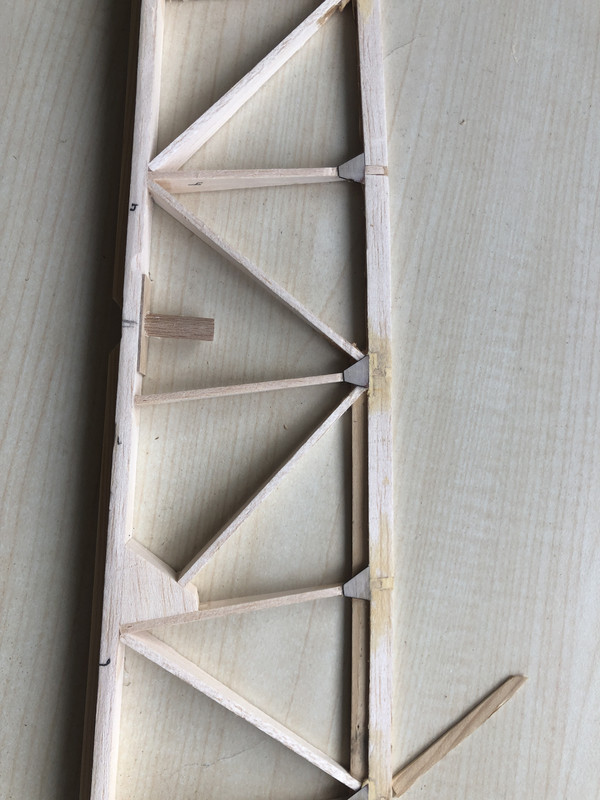
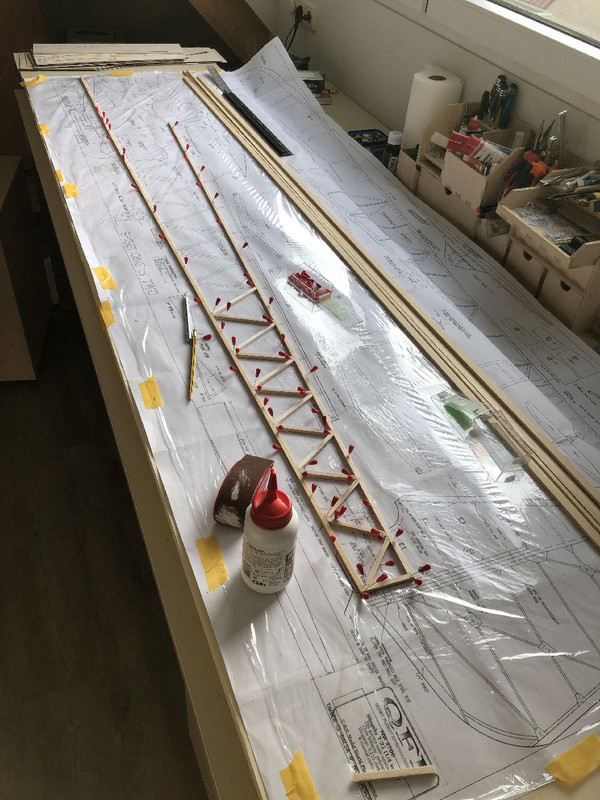
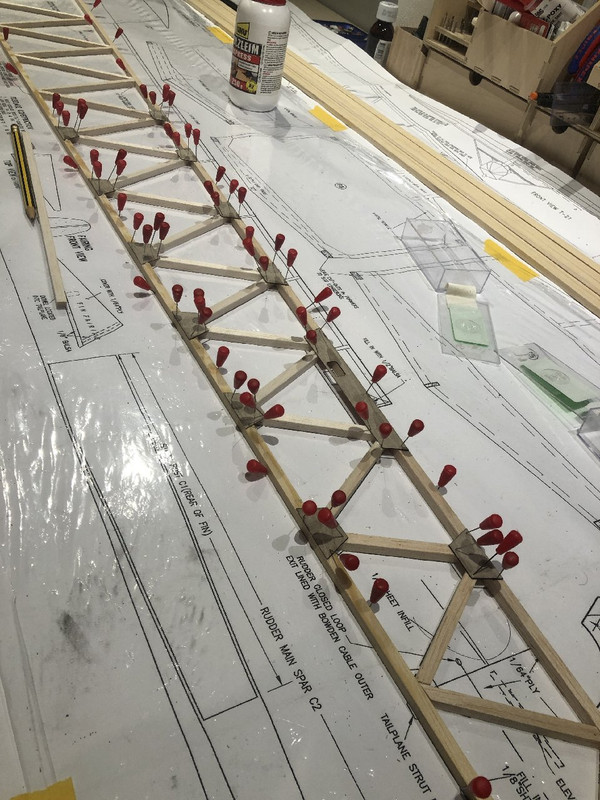
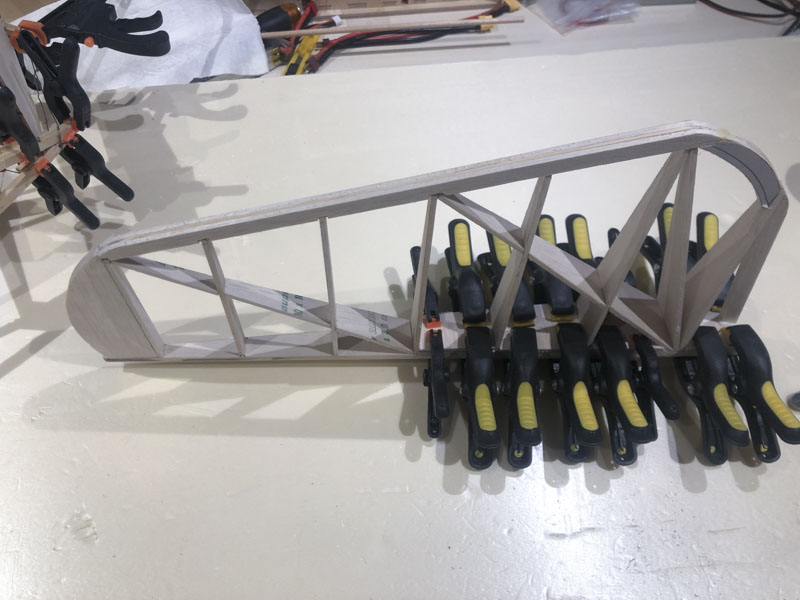
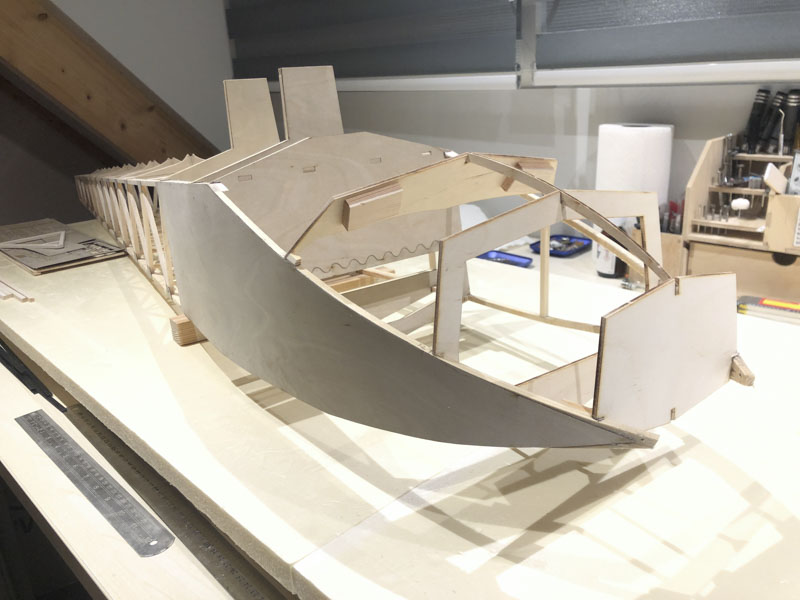
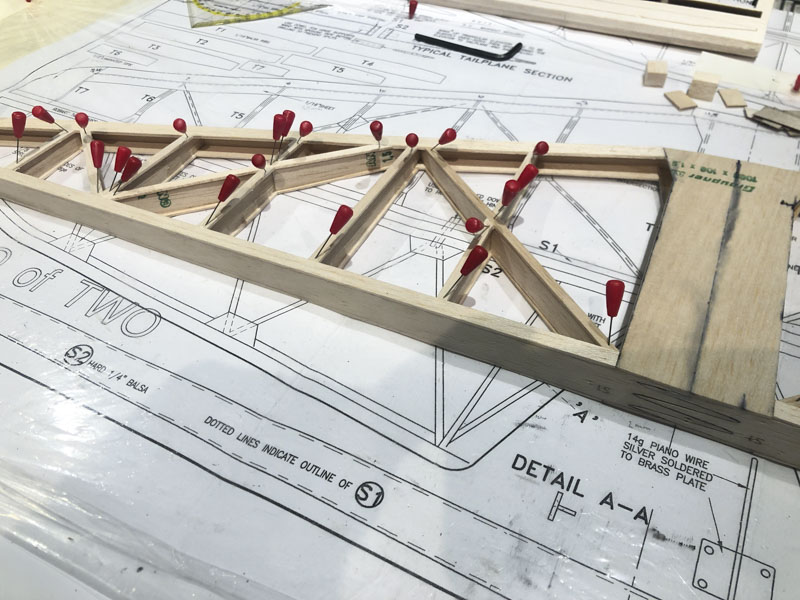
In the progress of uniting the fuselage halfs:
And making the diagonals to fit:
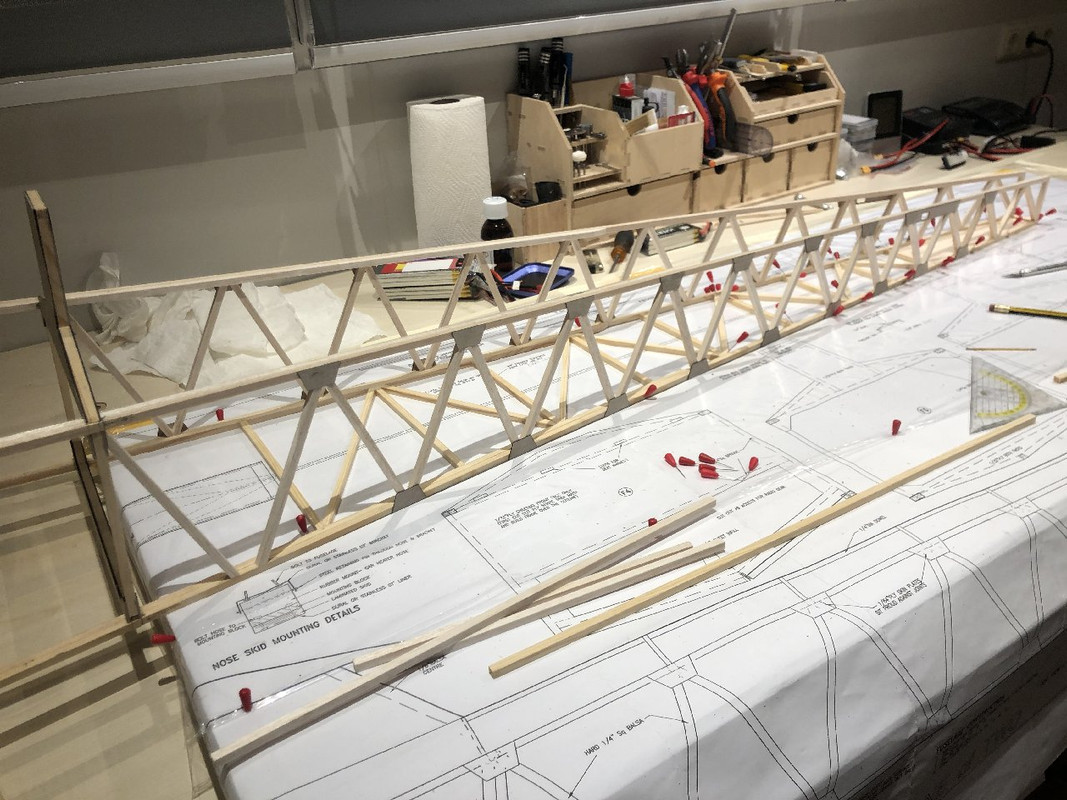
I am glad the full aft section of the T21 is quite square, so I can do this job straight on the plan.
The diagonals are 6x6mm spruce on the bottom and balsa on the top.

I guess so far the build is quit easy

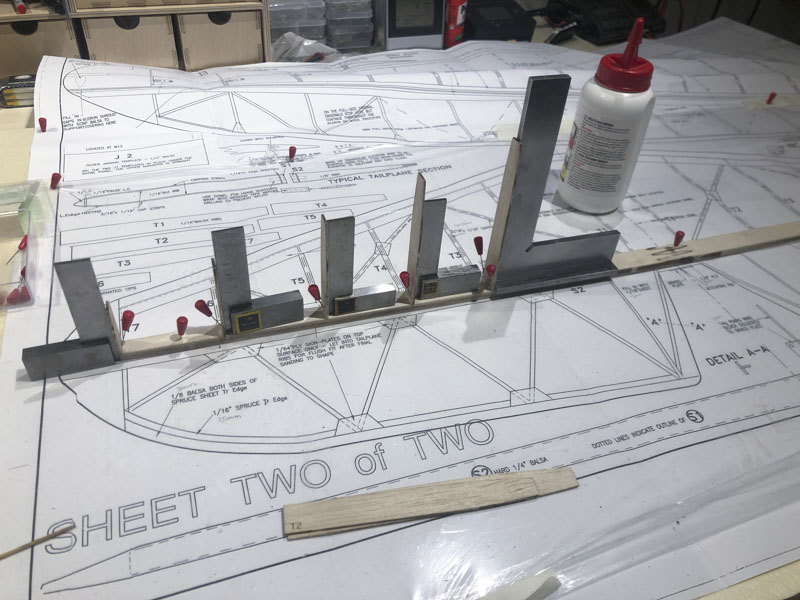
I think I'm going to build the tail/rudder and elevator section on the side while stuff on the fuselage is drying. I'll have to make partial copies of the original plan to do this though (don't want to cut up the original plan)..
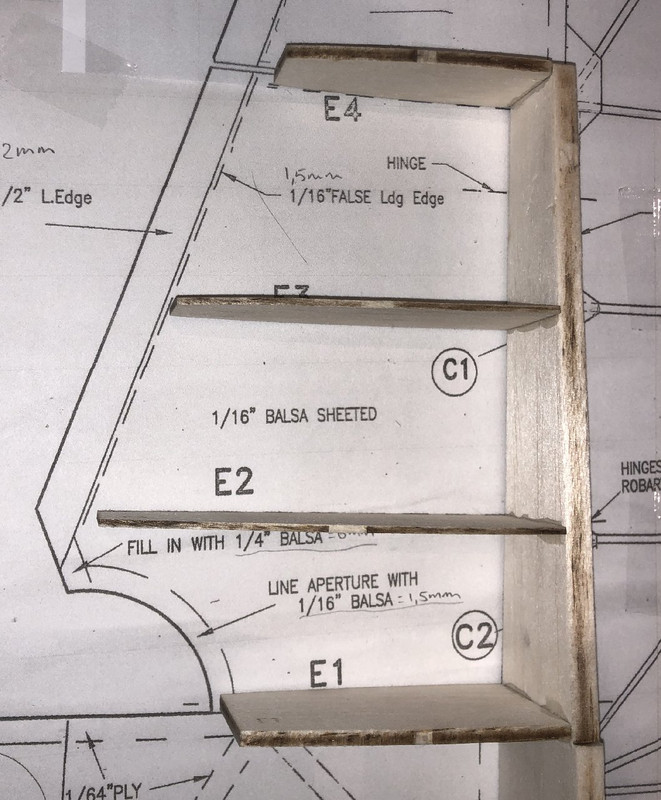
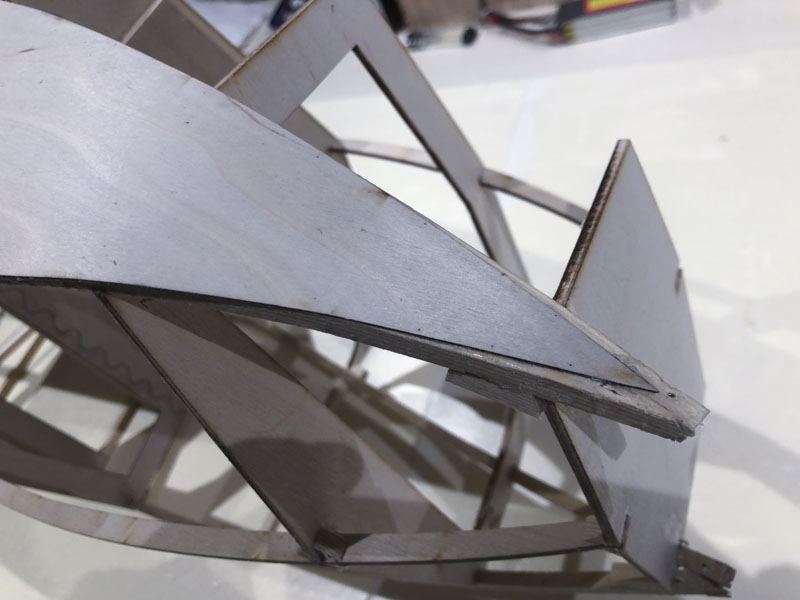
Looking ahead of the tail sections I notice 'leading edges' and 'false leading edges'. But, I do not understand the purpose of these..
Is the purpose of a false leading edge to be less thick than a leading edge in order to have a glue surface for the covering material (eg leading edge is 12mm and the false one is 9mm in order to cover both sides with 1.5mm sheeting)?
Or, are both joined just to get the correct thickness of the whole leading edge by using standard size ply and balsa?
I hope my question make sense

Re: 1/4 scale T-21 CW
Posted: 23 Jan 2020, 21:34
by chris williams
The false LE sits under the sheeting to give you a nice, straight edge. The final LE goes on last and covers the false LE and the top and bottom sheeting
Re: 1/4 scale T-21 CW
Posted: 23 Jan 2020, 22:56
by SedB
Clear! Thanks a lot
!
Re: 1/4 scale T-21 CW
Posted: 07 Feb 2020, 11:30
by SedB
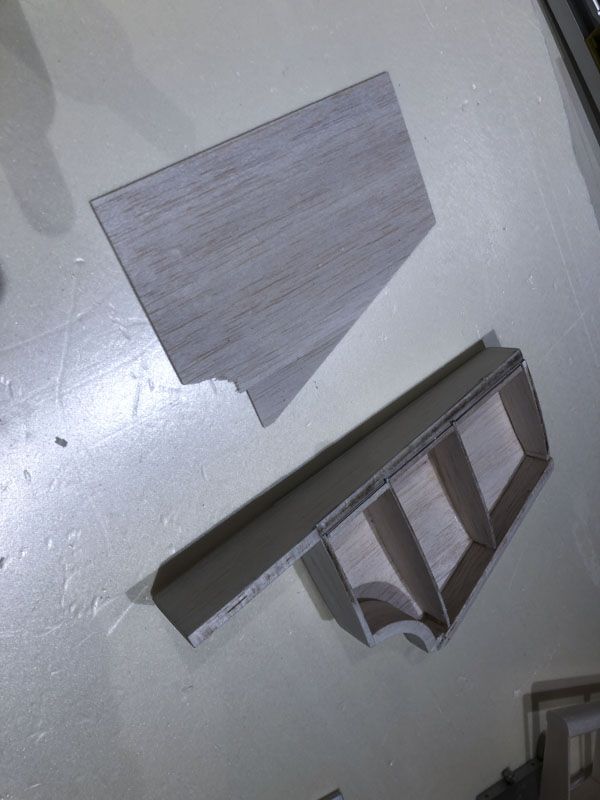
Now I that have something "I can touch" in hand, it's nice to focus on some smaller things like the "glove compartments".
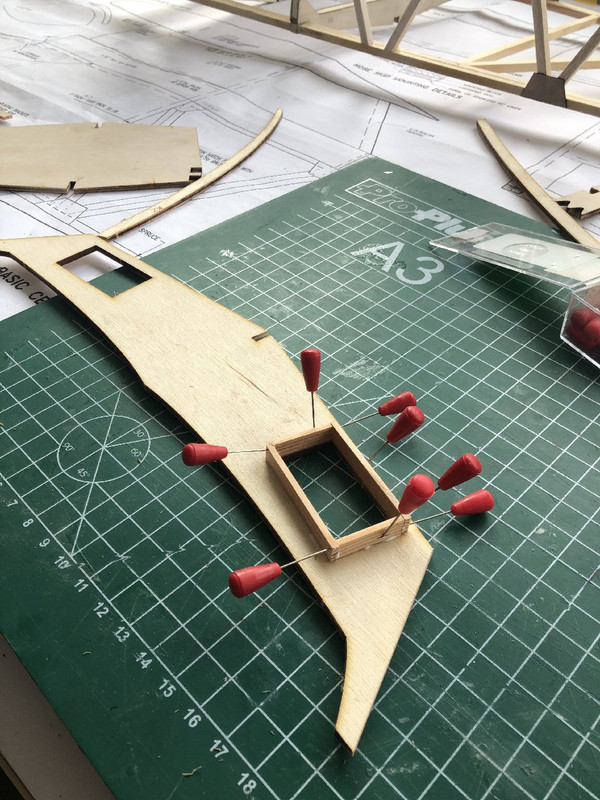
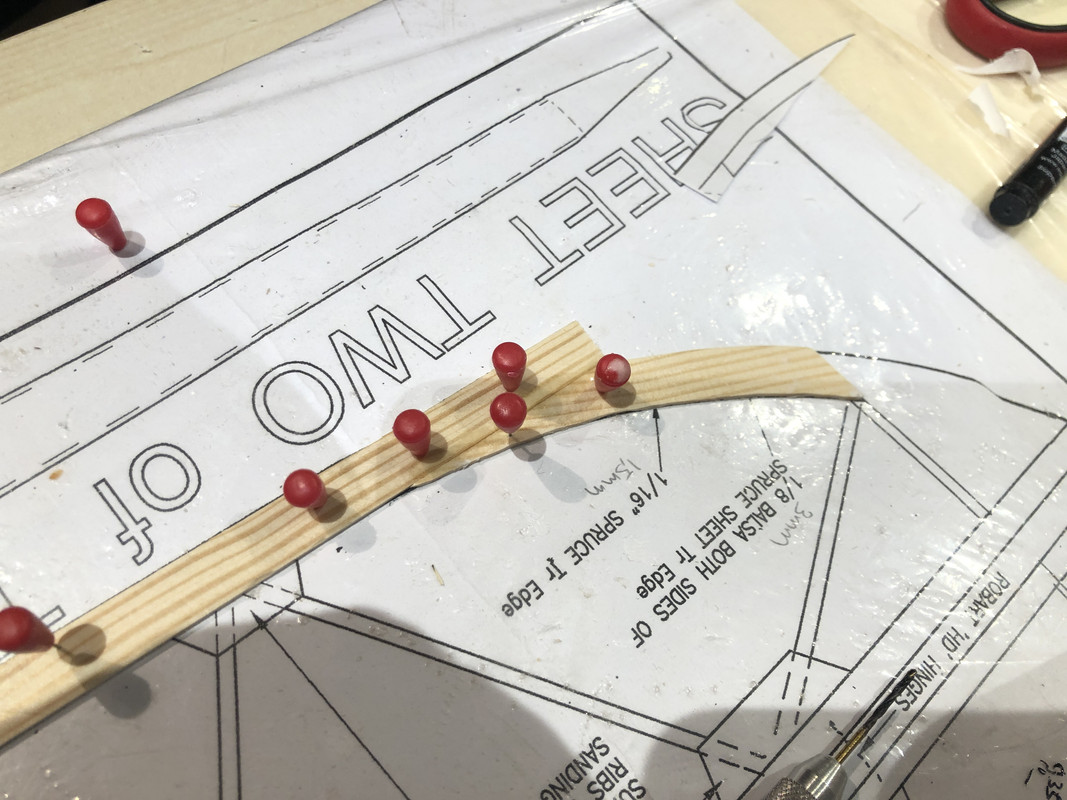
Having issues bending the front longerons over the plan, I came up with this:
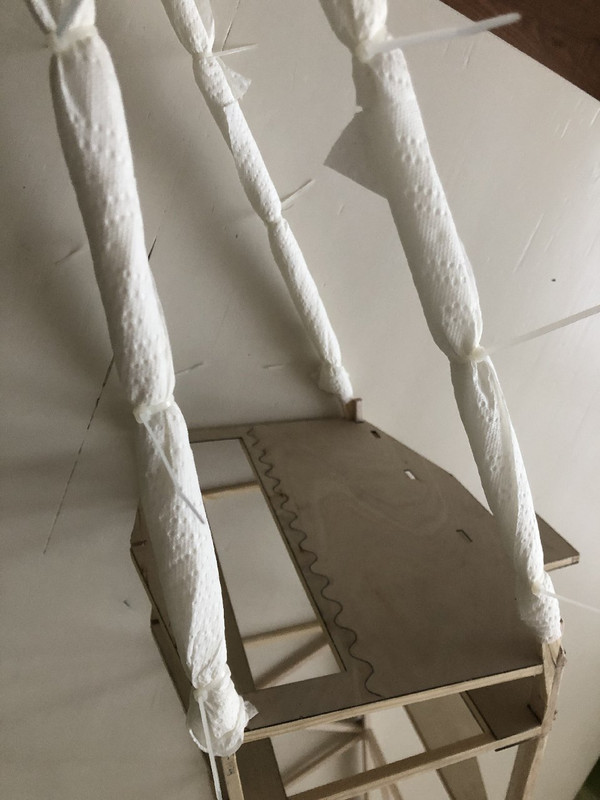
I know; it looks far from professional, but it seems to work. Using kitchen towel and draining this with hot water every few minutes makes that front becomes weak and bendable as were the aft section stays dry. I'm pretty sure there is an easier or more logical way for doing this, but none I've learned so far

Bending over the plan:
This turned out to be not as easy as I imagined. Next time I will have to build a ramp or some thing to keep the whole structure in place, to make sure everything lines up!
As said, bending was a lot harder than I imagined. The glue on the upper parts came loose duets the moisture. Good thing is that they will fit eagerly back in to place later on.

Well, now I can bend them over the plan and hopefully get them to fit straight again once dry. I did make little saw cuts on the inside to remove material and allow for a tighter bend. Before the actual bending I filled the saw cuts with glue.
Re: 1/4 scale T-21 CW
Posted: 07 Feb 2020, 11:57
by chris williams
These days, where possible, I would laminate two 3 x 6 mm strips together to get an easier bend...
Re: 1/4 scale T-21 CW
Posted: 07 Feb 2020, 16:49
by RobbieB
chris williams wrote: ↑07 Feb 2020, 11:57
These days, where possible, I would laminate two 3 x 6 mm strips together to get an easier bend...
First choice every time........
Re: 1/4 scale T-21 CW
Posted: 09 Feb 2020, 14:55
by jack
nice job sedb,l built mine a while ago from CW plans,l fully concur with cliff,s comment re keep the tail as light as possible,to avoid incurring the wrath of our local "sky pilot" and his ultimate boss,l managed to locate a pair of 6 volt PB batteries in the nose,one either side of the centre line,even so l still needed some church roof as well
good luck with the rest of the build...jack.
Re: 1/4 scale T-21 CW
Posted: 09 Feb 2020, 20:51
by Dave still
I'll follow I'm looking to build a scale ship for next year not sure which to go for.
Can I ask what flying experience you have? I've only flown small flat field stuff and going to learn to slope fly this year and got 3 models to go through. Then maybe a scale build next winter.
Dave
Re: 1/4 scale T-21 CW
Posted: 18 Feb 2020, 11:07
by SedB
Thanks for your comments! Yes, I'll do my best to keep the aft as light as possible (scraping of glue residue, but doubt that will make the difference
).
My flying experience is 3 years with motorized gliders (up to 4meters span) and planes up to 3meters. Too I did some slope soaring.
I'll be building tow hook into this one so I can use it both on the field and slope. I haven't figured out where to put the tow hook yet. Looking at reference pictures it seems that the T21 had this installed on different locations (or the pics are misleading me).
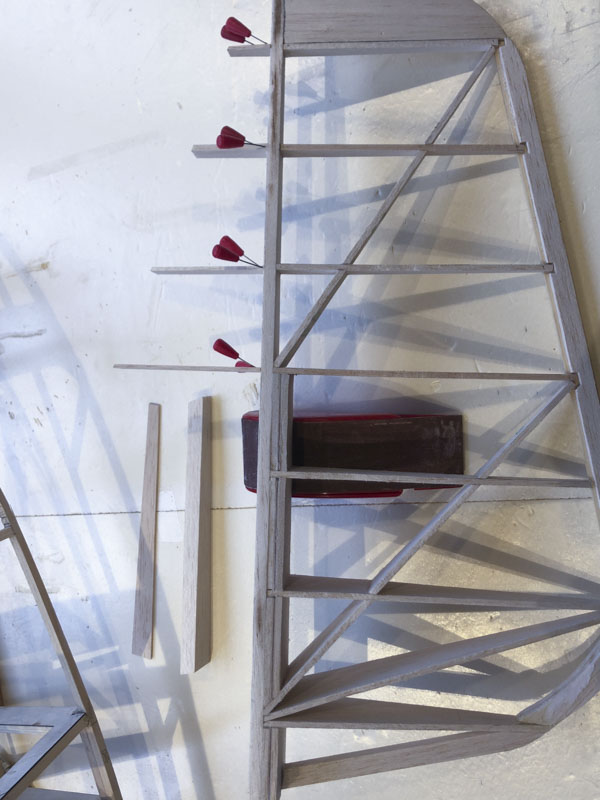
I think I'll end up installing it next to the skid, on the belly of the glider.
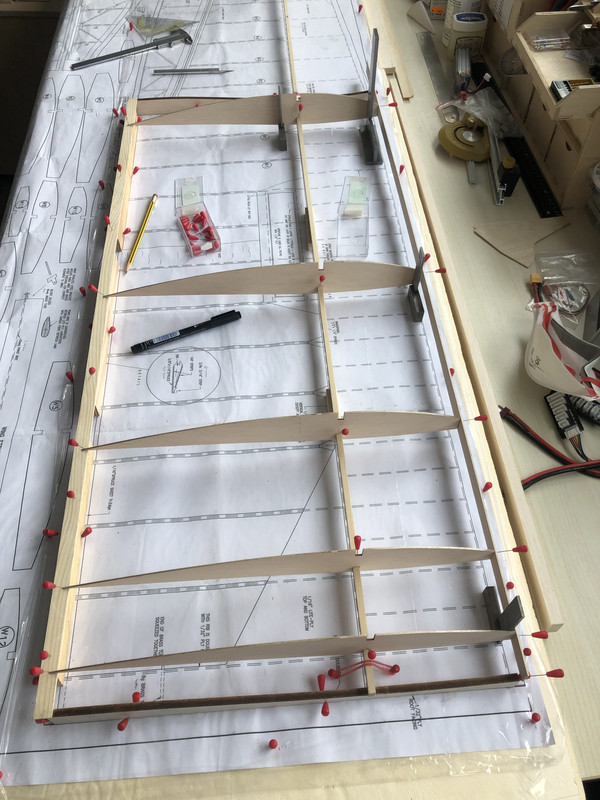
Starting with the tail section, here ribs 2 and 4 seem somewhat short:
And while stuff is drying I started on the rudder too:
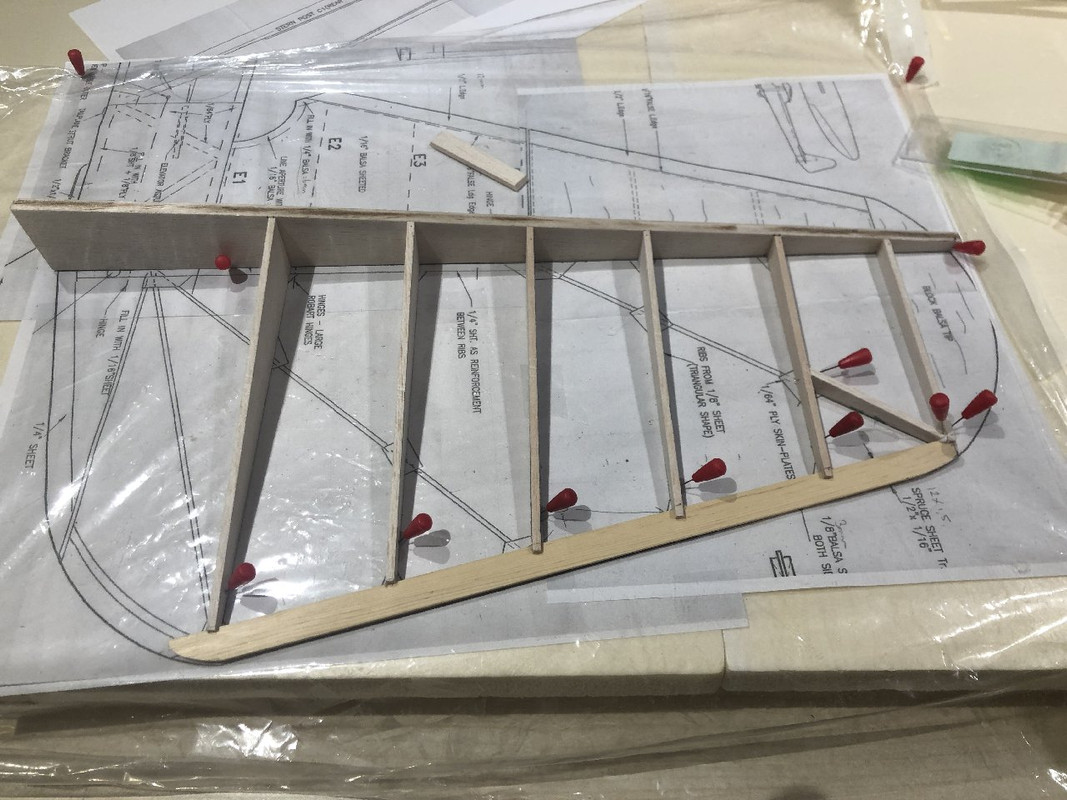
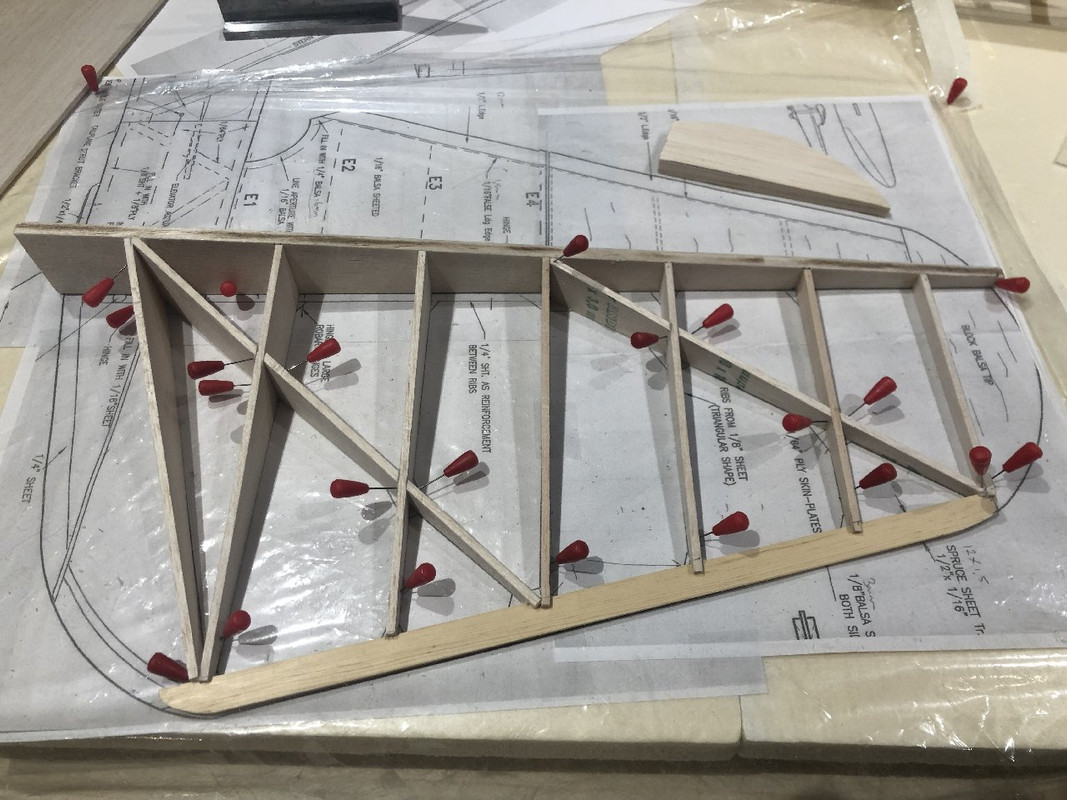
Next time I think I will as a small ramp (is that correct English?) instead of building these curved parts on the plan. Haven't always figured out what the best technique for building straight..
Daniel
Re: 1/4 scale T-21 CW
Posted: 18 Feb 2020, 11:28
by chris williams
I usually do rudders like this...
Re: 1/4 scale T-21 CW
Posted: 13 Mar 2020, 20:21
by SedB
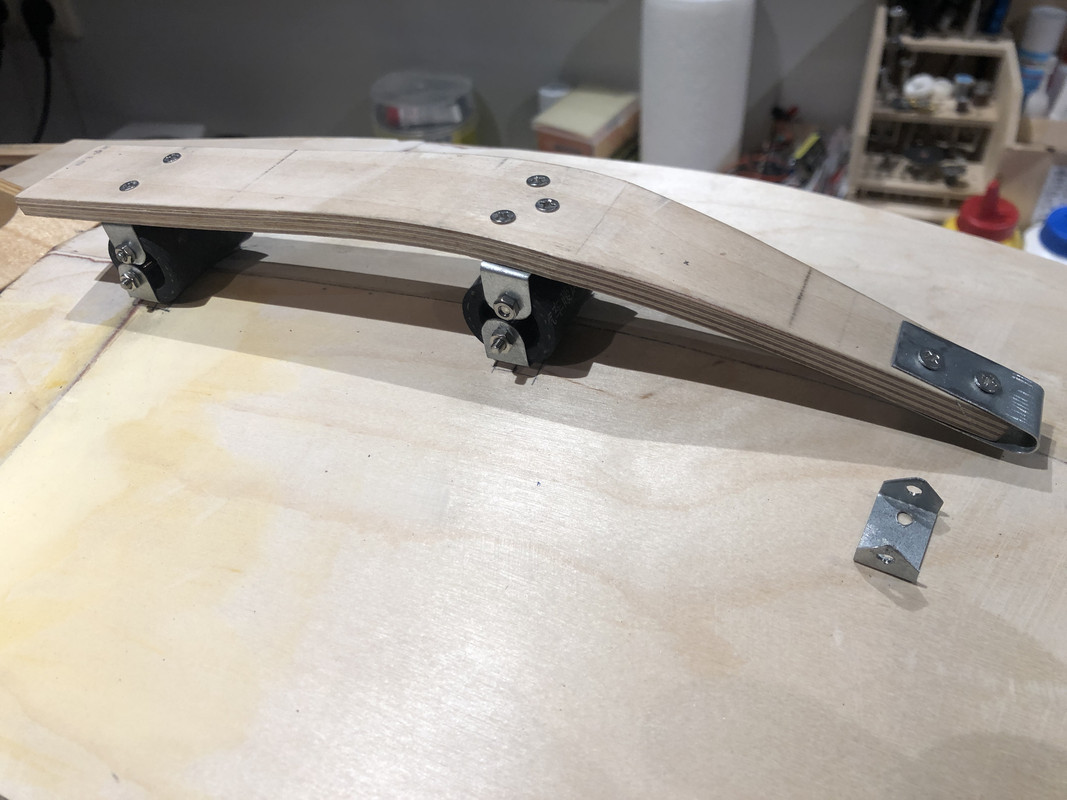
Preparations for the skid are underway;
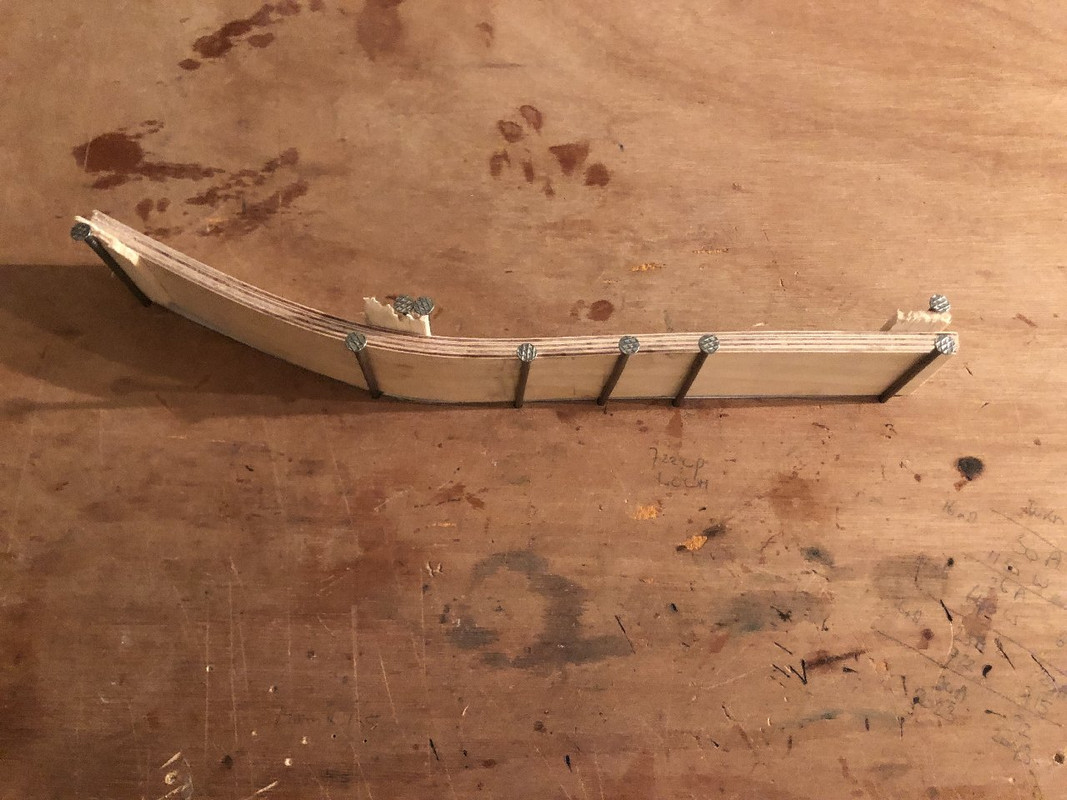
I'm not too sure yet on how to tackle this; The four layers of ply (drying here, but not glued yet) are okay and still give some flexibility. Though gluing them with epoxy and adding carbon strips seems a bit rude, as all the epoxy I'm used to gets rock hard. The way I understand skids is that they are supposed to have some flex, or is this only for full size gliders? Any thoughts are welcome!
Backspine preps:

And the whole serie done:
These will be glued to the inner sides of the frame, instead to on top of it.
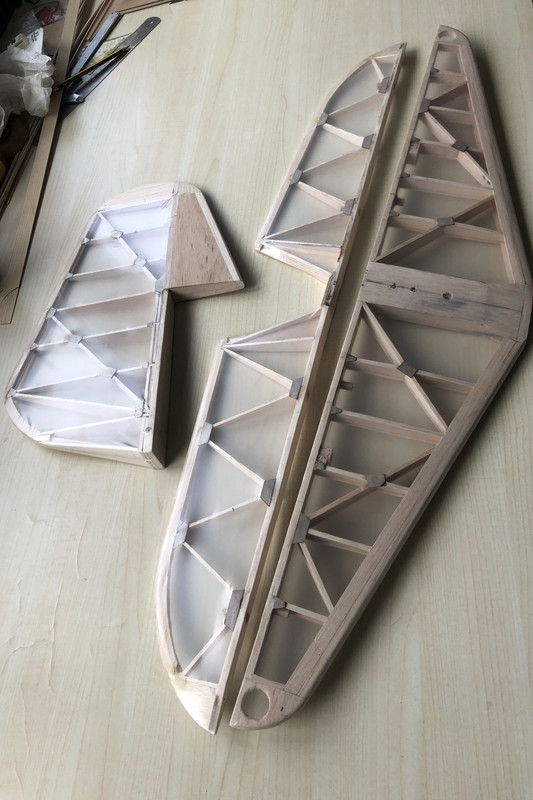
Eventhough trying to keep the aft as light as possible, I felt the need for some extra meet on the rudder as the balsa base seems to be to soft for holding hinges. So, on the critical spots I added a small layer of ply:
And the whole rudder done:
I must say though looking at some other builds here, I do feel like a slowmover
But, the more I get done, the more fun it gets!
Cheers
Re: 1/4 scale T-21 CW
Posted: 14 Mar 2020, 09:11
by john greenfield
On my laminated skids, I always use PVA glue as it remains flexible. I have never had one fail by delamination so can commend the option as being well tried and tested.
AEB
Re: 1/4 scale T-21 CW
Posted: 15 Mar 2020, 09:42
by FrankS
Re Tow Hook, if this is for aerotowing it wants to be in the nose, our Mike Trew 1/5th scale T-21 aerotows lovely.
Friend has also just picked up a 2nd hand T-21 (1/5th scale) and it has a tow hook along side the skid, obviously for winch/bungee launch, but we haven't tried this yet.............
Re: 1/4 scale T-21 CW
Posted: 05 Apr 2020, 19:14
by SedB
Thanks AEB and Frank!
I'd love to hear how that tow hook alongside the skid works out eventually!
The rudder is nearing completion:
The whole nose part is not as easy as I though it would be. Seems my method of working and pinning down things deviates from what I see on the forums.
For my next built I for sure will try to find a way to keep the whole model in position during the main part of the build.
For now it didn't work out for me since I had a hard time bending the longerons. I might see into a magnetic surface to build on, looks like a more easy way to keep the whole build straight
Simple side question; did someone ever made successful use of one of these?:

For some reason it seems impossible to cut longer straight strips with this simple tool..
Re: 1/4 scale T-21 CW
Posted: 05 Apr 2020, 19:35
by Peter Balcombe
Seb,
I expect that Chris Williams would have used “Bridson Jig” when he built his T21.
See
https://scalesoaring.co.uk/phpBB3/view ... 826#p26826
I find that the balsa stripper seems to work better if you use a new blade and angle the blade as much as possible so that the tip end cuts much later than the top part
Peter
Re: 1/4 scale T-21 CW
Posted: 05 Apr 2020, 19:46
by chris williams
You shouldn't need a jig, really, for a slab-sided fuselage...These days I use horizontal liteply alignment plates to keep things straight
Re: 1/4 scale T-21 CW
Posted: 20 Apr 2020, 16:01
by SedB
Thanks again for the directions!
Here some more progress:
Sorry, I did not setup a boot for taking pics
..
Now with the sidepannels mounted it somewhat starts to feel like something more solid!
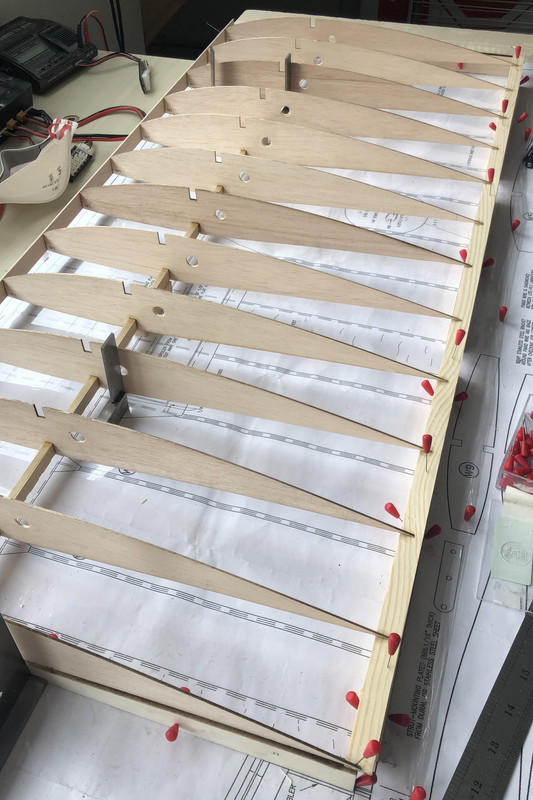
I found this the easiest way the get the ribs glued in straight. It must be said that the trailing edge is of very soft balsa. I might reenforce, but will have to seen what the whole structure will feel like once completed.

Re: 1/4 scale T-21 CW
Posted: 10 May 2020, 18:49
by SedB
Re: 1/4 scale T-21 CW
Posted: 06 Jul 2020, 20:26
by SedB
Since it's terrible weather for the last couple of days (either to wet, to windy or both), I spend some time on the T-21.
The wood here was to wide to bend, eve after letting it swim in my pond for a couple of hours. Easiest solution seemed to make the trailing edge out of two pieces.

Lining thing up before grabbing glue


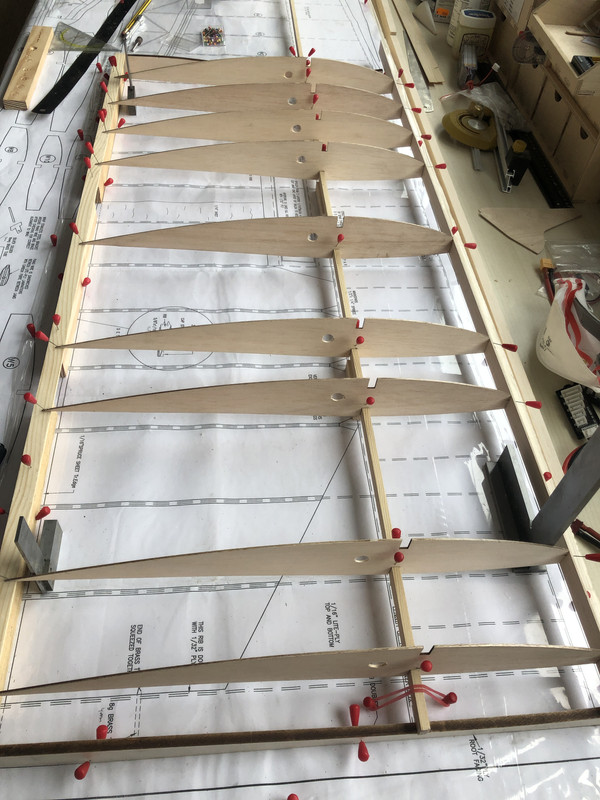
Making the ribs for the elevator is quit easy. I cut them from both side though so I do not have to sand them in shape later on.
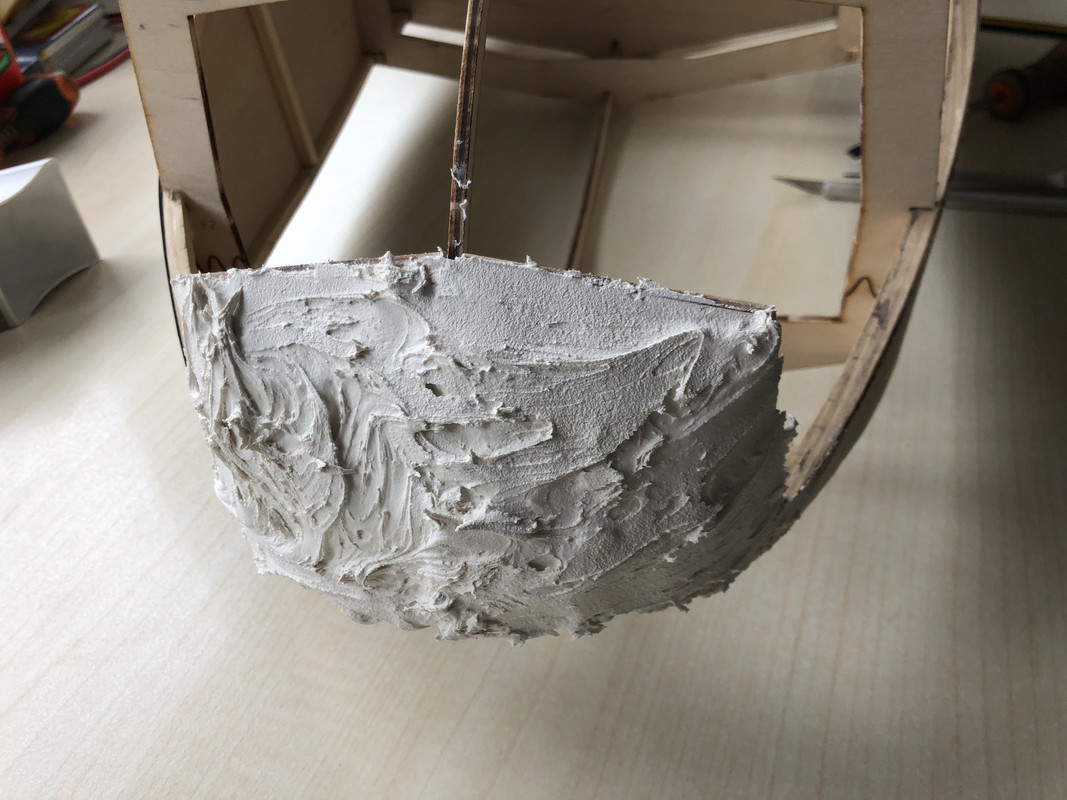
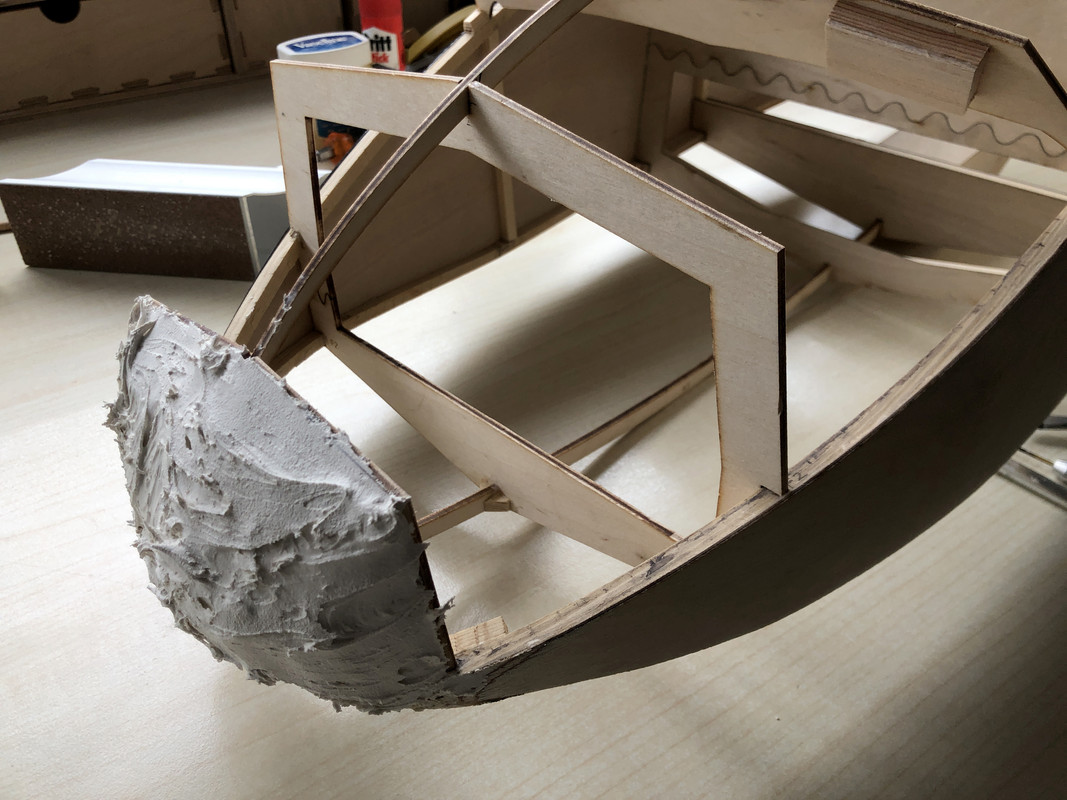
Meanwhile I started to play with some filler. Not to difficult too, though had to do this in 2 stages since the sticky stuff would not stay in place..
For the experts I do have a question though.
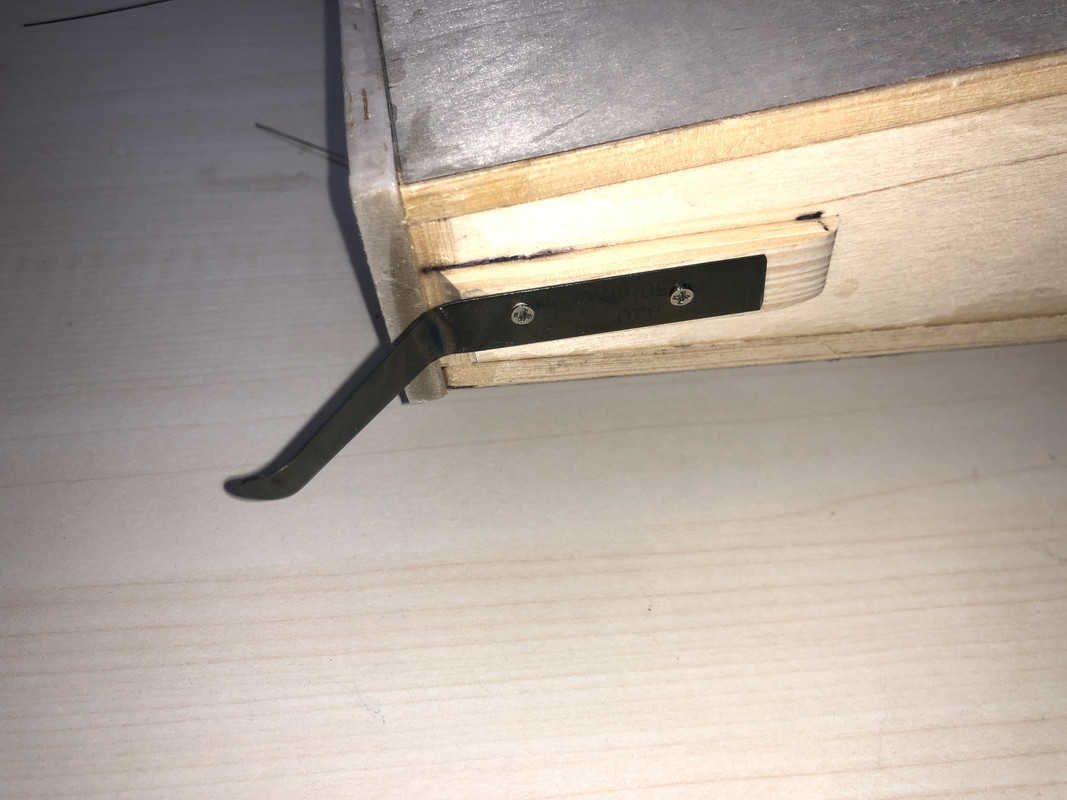
This glider has a tail skid. What do you nowadays use to make this skid?
The drawing mentions feeler gauge, though I wonder whether there is an alternative?
I tried to make an example out of duralumin, but this stuff is to weak. Steel sheet (I tried .75mm) is to weak too. I think what I need is something like piano wire, though is this material available also in sheets (only can find rods)?
Re: 1/4 scale T-21 CW
Posted: 06 Jul 2020, 21:46
by chris williams
I'm not surprised you couldn't bend the spruce...! (The join is shown on the plan) The filler usually takes three or four applications, but you really need to finish the sheeting first, before you apply any more. I'm pretty sure I remember finding a thick enough feeler gauge to do the job at the time...
Re: 1/4 scale T-21 CW
Posted: 06 Jul 2020, 21:53
by Cliff Evans
I used a feeler gauge on my 1/4 and 1/3.5.
Re: 1/4 scale T-21 CW
Posted: 06 Jul 2020, 21:58
by Peter Balcombe
SedB,
Are you sure you do not have a car spares or car accessories shop nearby in the Netherlands?
The feeler gauges are simple sets of accurate thickness (not that this matters here) small strips of tempered spring steel of several different thickness.
(They are used to check car engine valve, or other clearance gaps)
You just choose the strip thickness you want & remove that piece from the set - then shape as required or use the standard strip shape.
Alternatively, you could buy some strip spring steel (usually comes annealed/soft), shape & drill, but then you have to heat treat the steel to harden & temper before use in order for it to be springy.
Re: 1/4 scale T-21 CW
Posted: 07 Jul 2020, 09:14
by SedB
You are right Chris, wrong text with photo. Indeed the trailing edge is made exactly as on the plan.
OK, so feeler gauge it is
I really thought these were things from the past, but old does not mean obsolete
Now I think about it; an old saw blade might come handy for future use.
Thanks a lot gents!
Re: 1/4 scale T-21 CW
Posted: 07 Jul 2020, 09:45
by StephenB
I went through all this Sed when trying to fabricate a tailskid for my Fauvette.
Whilst I didn't try the feeler gauge trick, I did attempt it with an old saw blade. The problem is that spring steel snaps if you try to bend it, it has to be tempered/annealed to allow forming - Peter Balcombe would give you good advice on this process. In the end I abandoned the idea and formed my tailskid from piano wire bent to a suitable shape and covered it with black heatshrink which gave the correct appearance. It worked for me on a 1/5 scale model and is functional but you may wish for something more scale like on your larger scale T-21.
Re: 1/4 scale T-21 CW
Posted: 07 Jul 2020, 20:46
by SedB
Thank you!
Re: 1/4 scale T-21 CW
Posted: 21 Jul 2020, 14:36
by Sean Fitzgibbon
Hi mate,
just wondering how your build is progressing?
We started at roughly the same time, but I then did no building or flying for around some six months but I did keep checking in on your thread.
Now that I have got back in the workshop and have managed to invest some time in it, my T21 is starting to take shape and I found it quite interesting that we were finding the same little issues.
Looking forward to seeing more pictures from you soon, thanks for sharing so far.
Sean.
Re: 1/4 scale T-21 CW
Posted: 29 Oct 2020, 09:35
by SedB
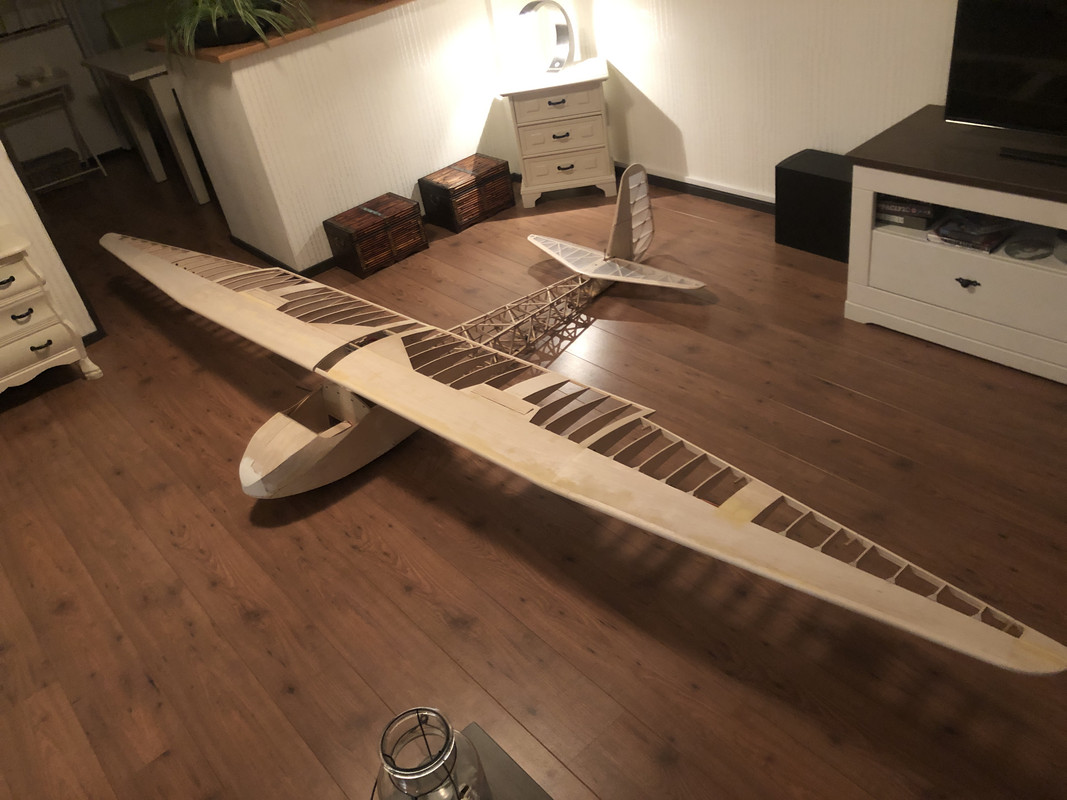
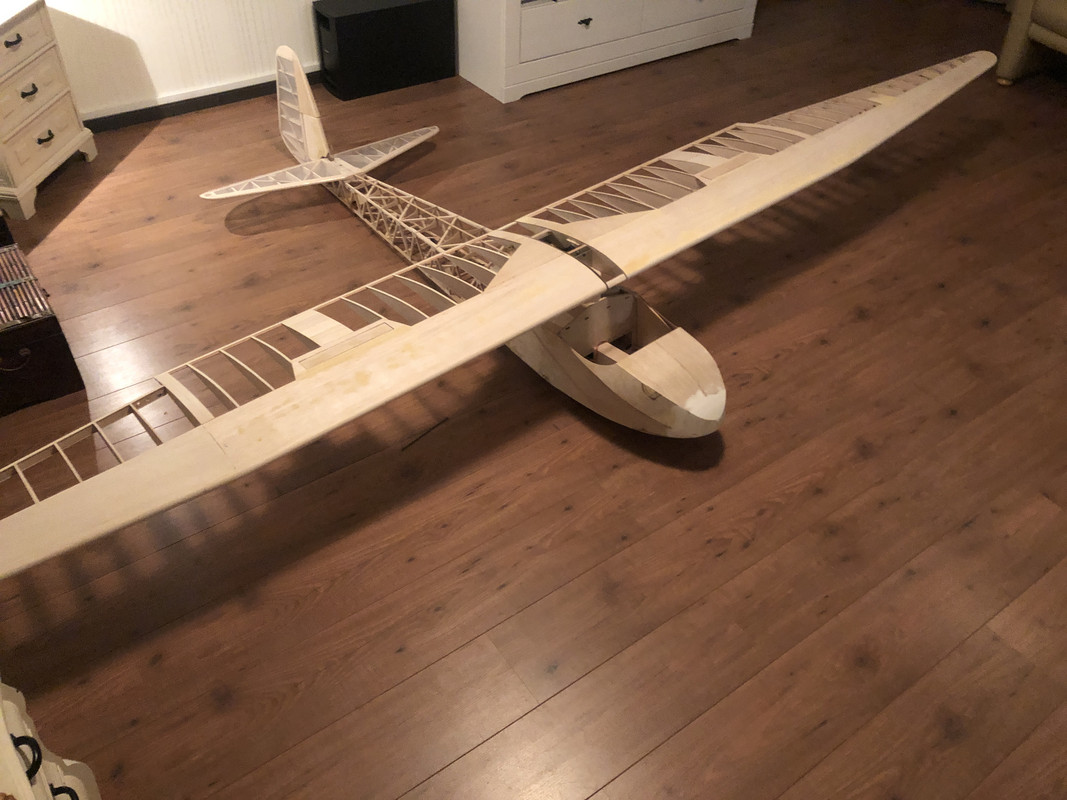
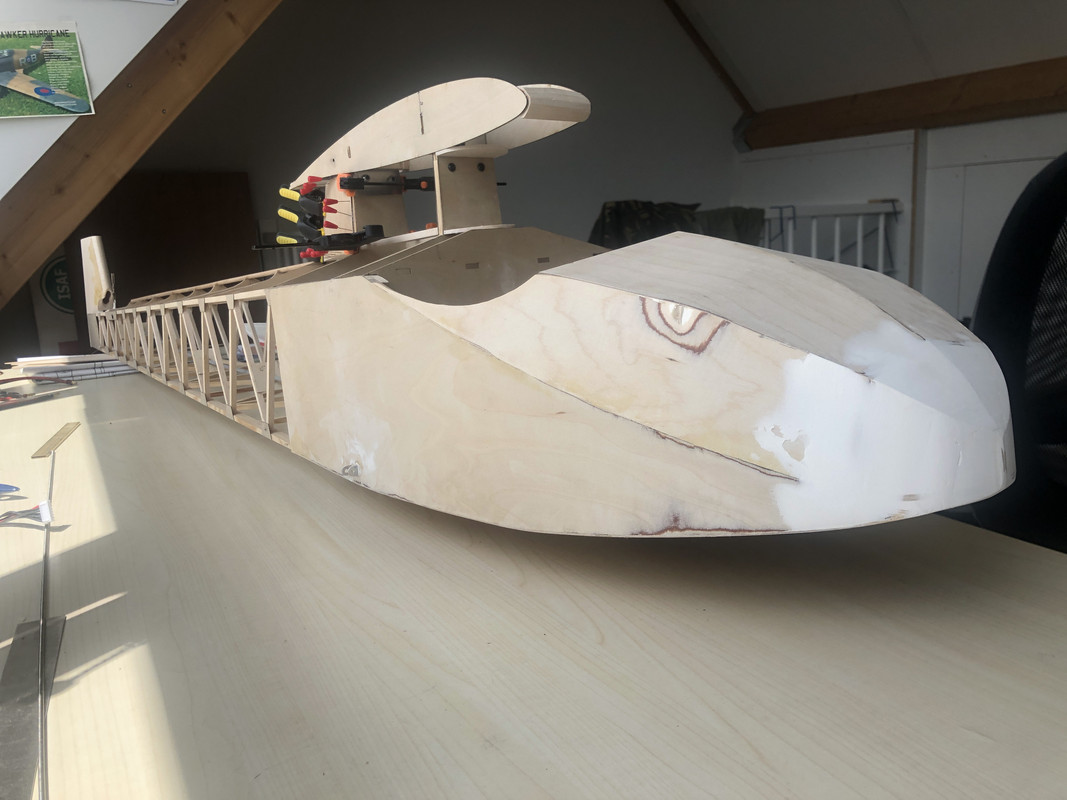
It's been a while since I posted any updates here. This is mainly because I did a lot of flying and little building during the summer. And the bits I built, seemed not to be that significant. Though, now I find my self having one wing ready for covering and the other is halfway build. So, time I post some pictures here!
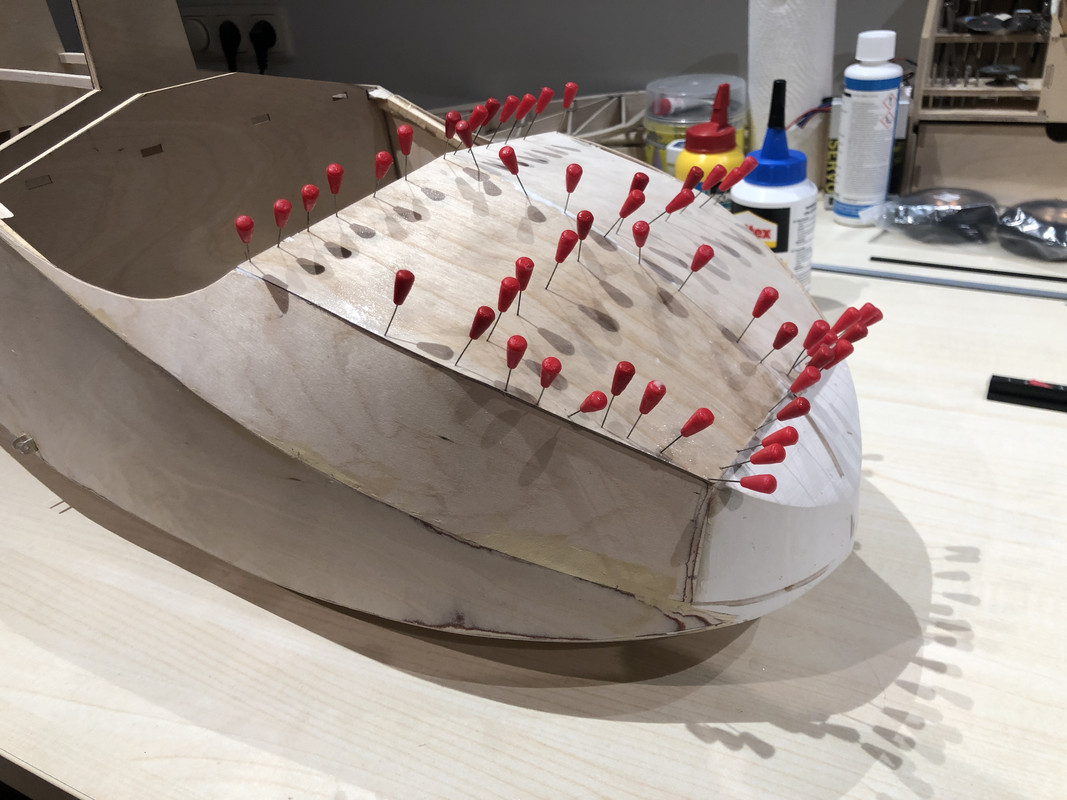
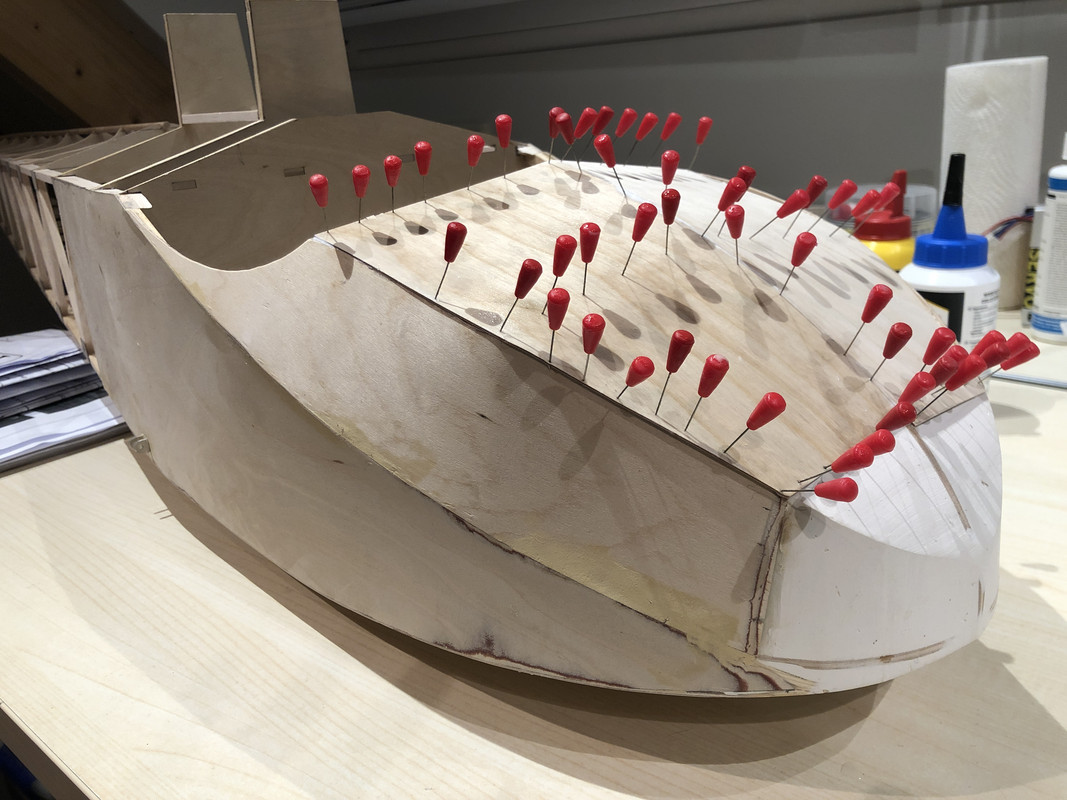
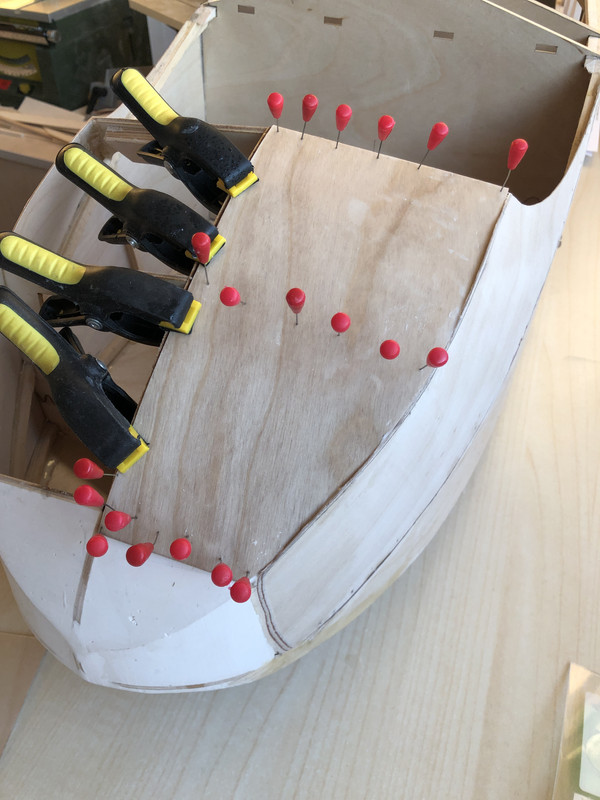
First I started sanding the nose by hand, which was not such a succes..
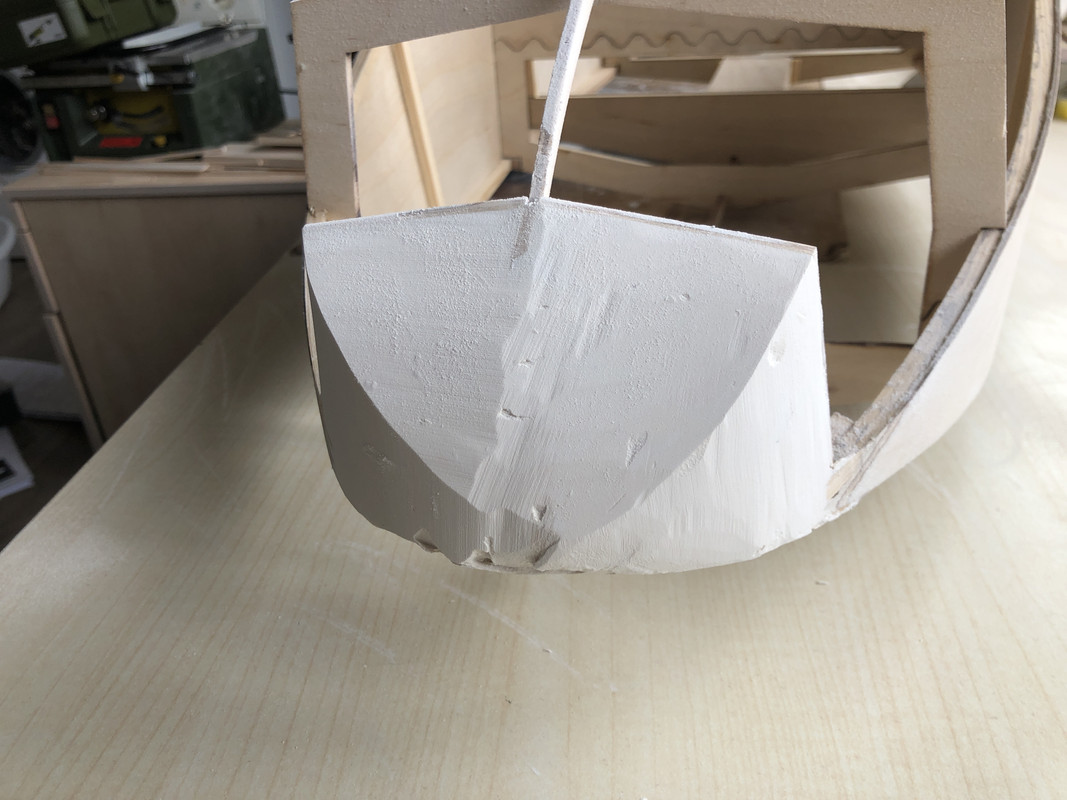
Then I started to use a small bandsaw, which made life easy (well, not the breathing part, dust was found literally every where!!)

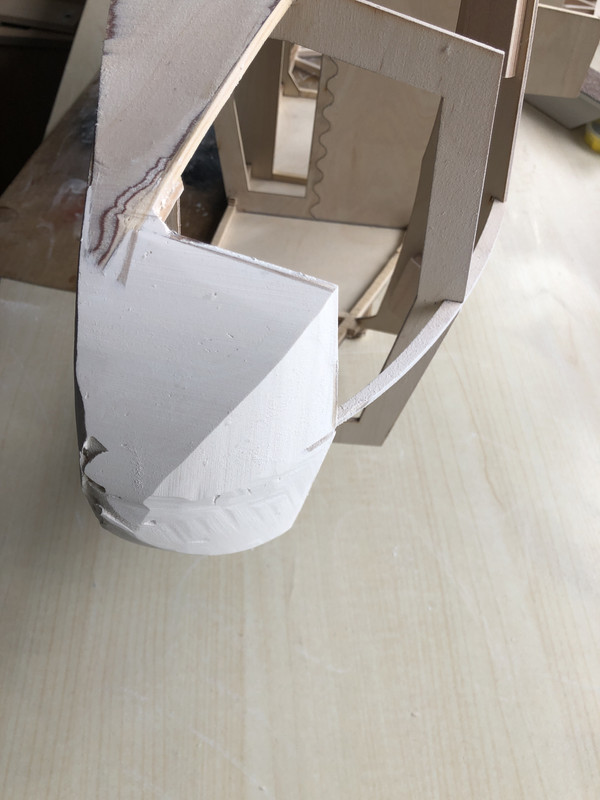
In the nose I put an extra piece of wood (cross outline of the nose) which gave me a good reference while sanding the nose to shape.
Time for some more sheet work:

I'm not sure how else to hold the sheet in place than using pins. These pins are made for balsa, so I keep breaking them while forcing them into the ply.
Starts to look like a glider now

:
https://i.postimg.cc/k4V4rdR0/DObers_Sedbergh_0050.jpg
More to follow..
Re: 1/4 scale T-21 CW
Posted: 02 Nov 2020, 20:11
by SedB
Re: 1/4 scale T-21 CW
Posted: 02 Nov 2020, 20:22
by SedB
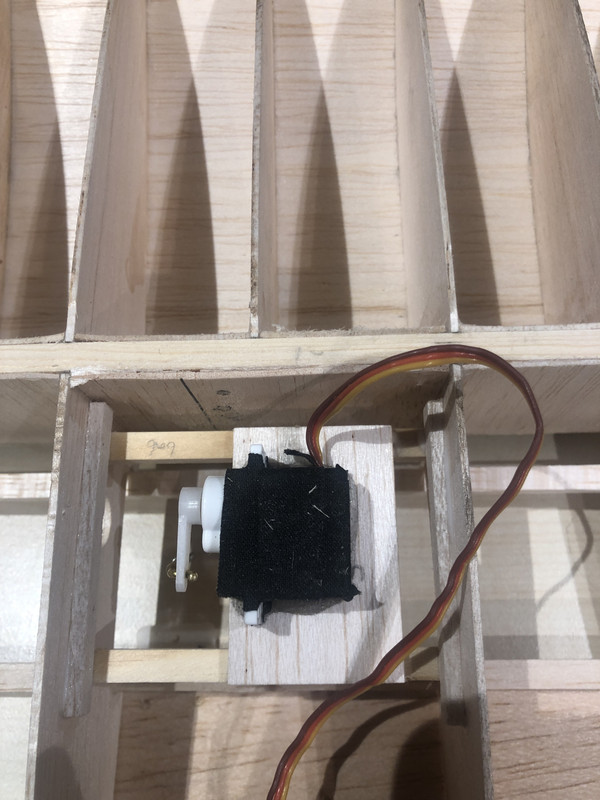
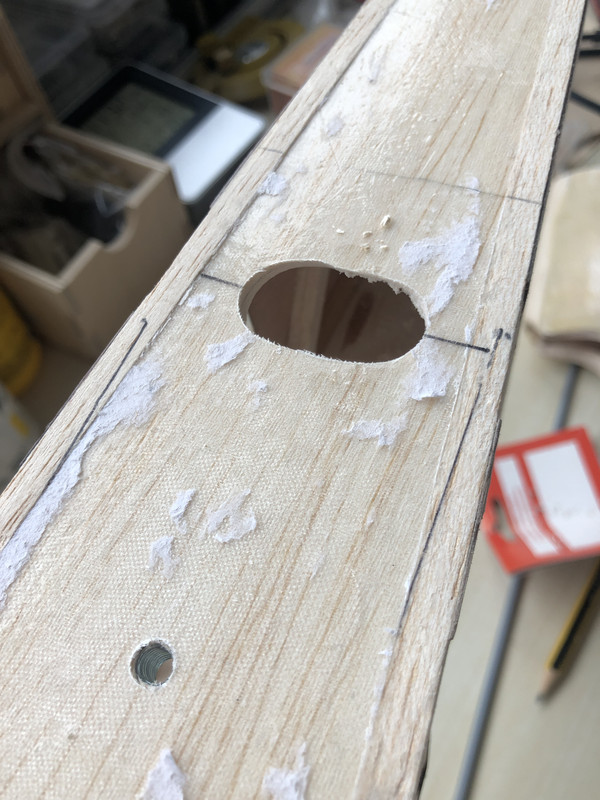
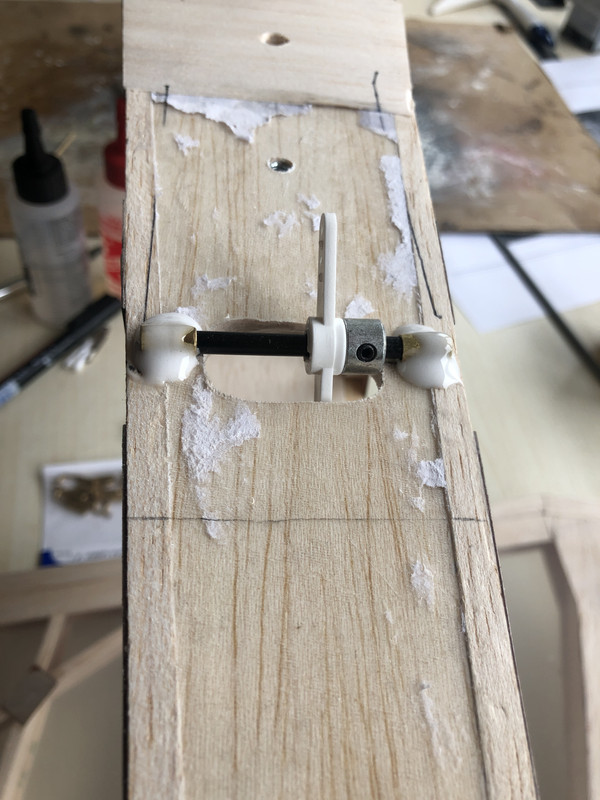
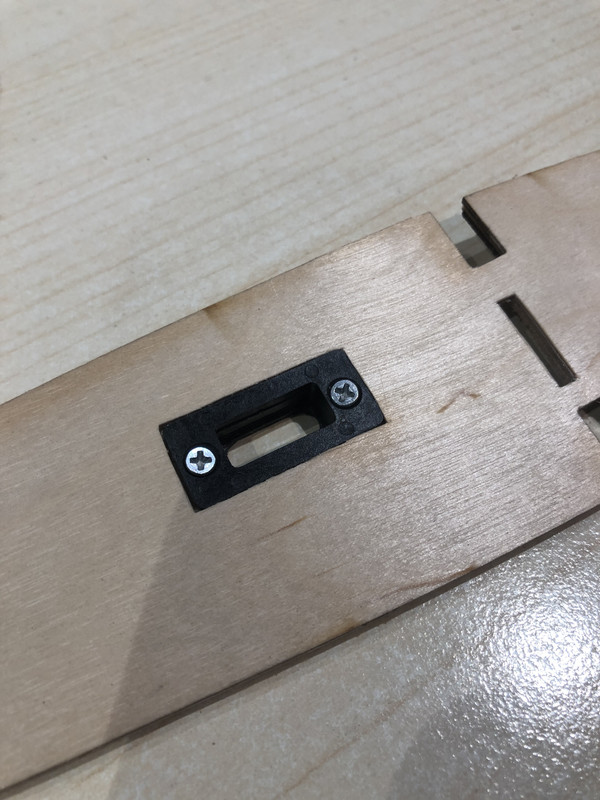
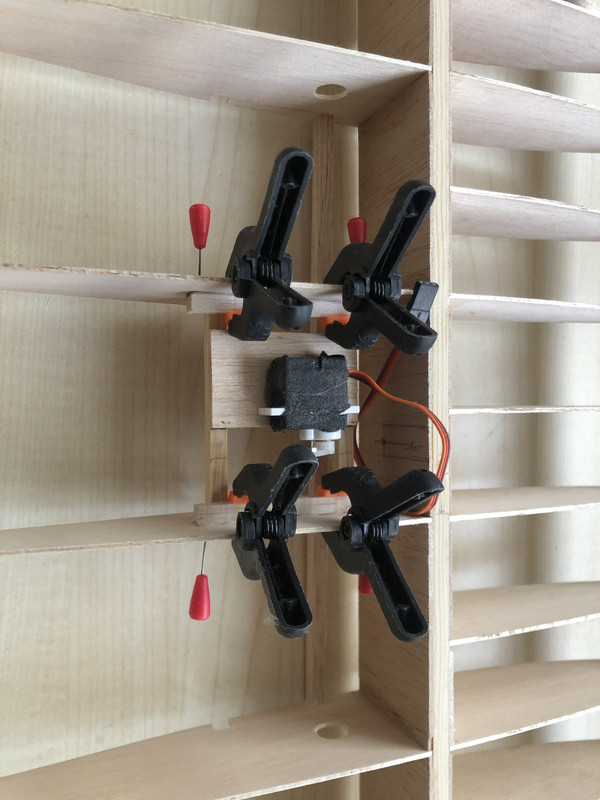
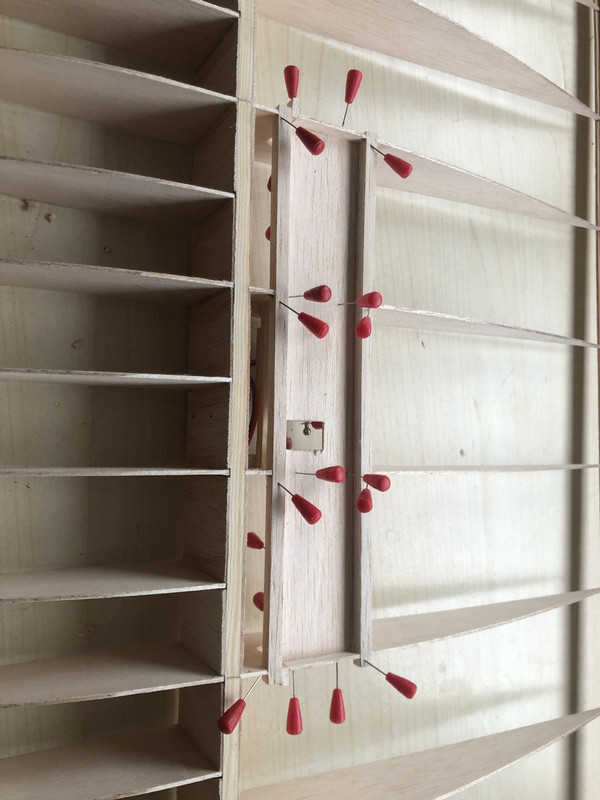
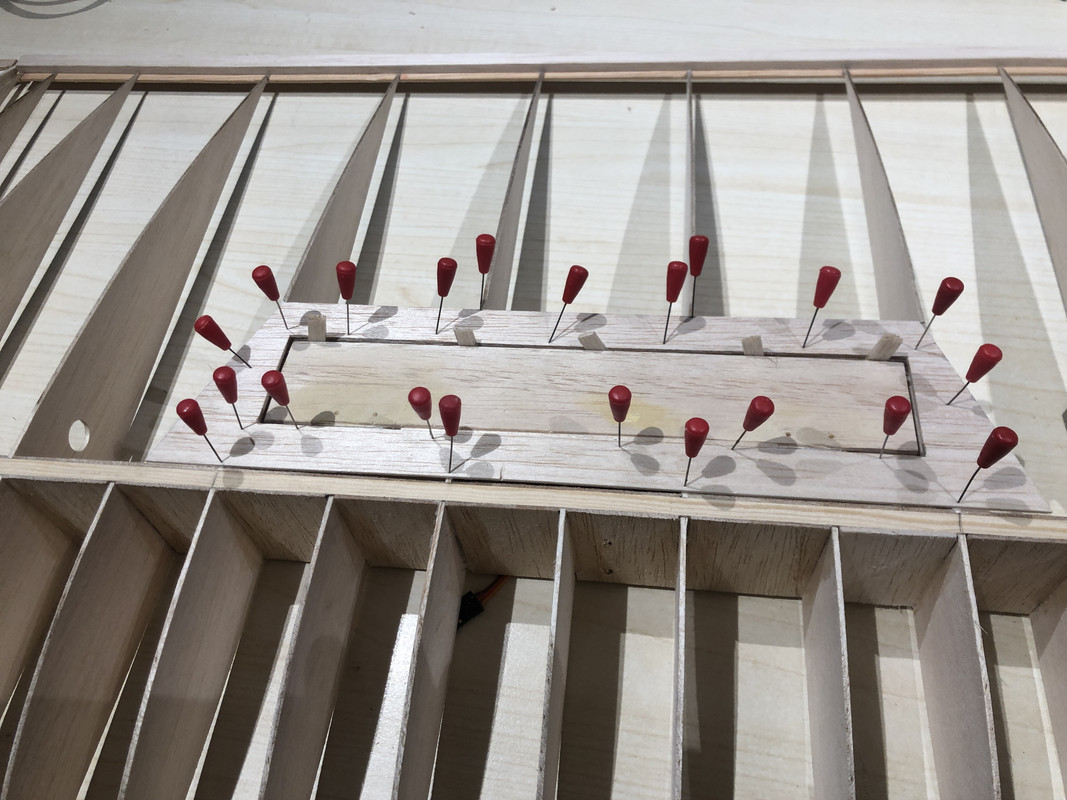
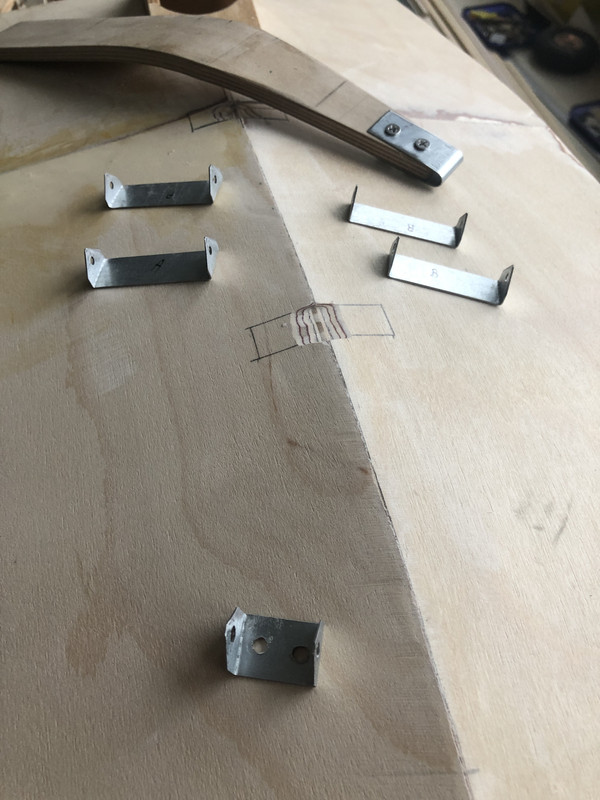
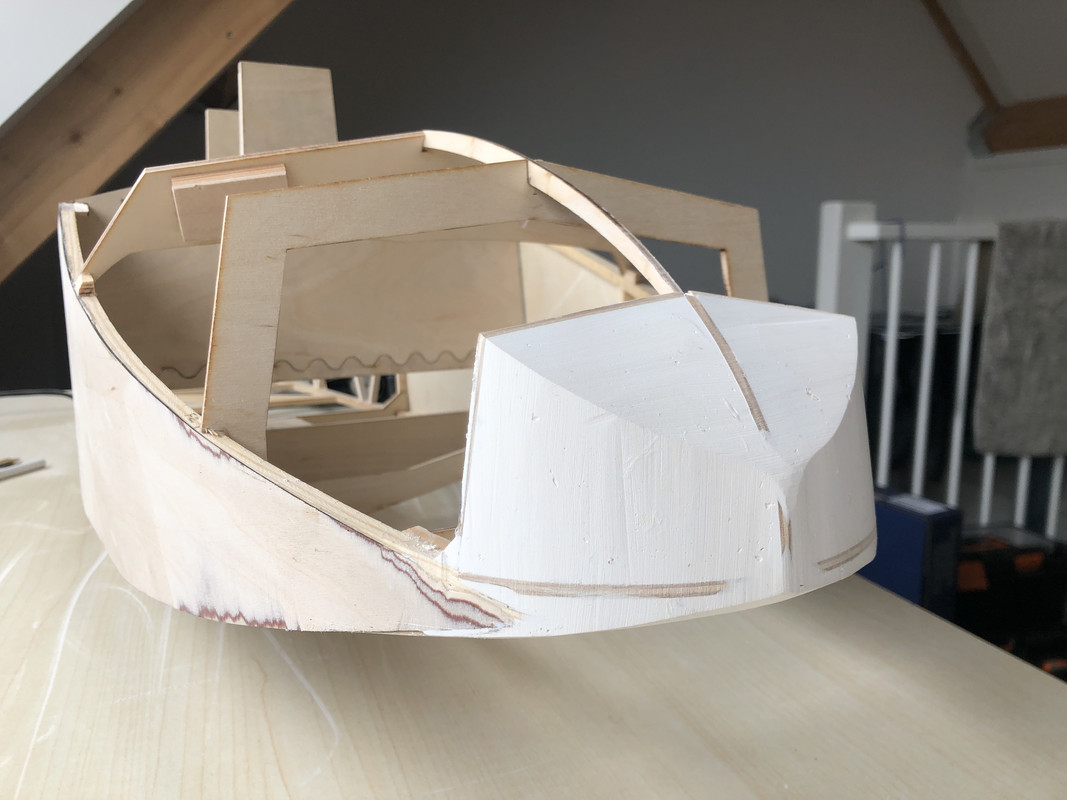
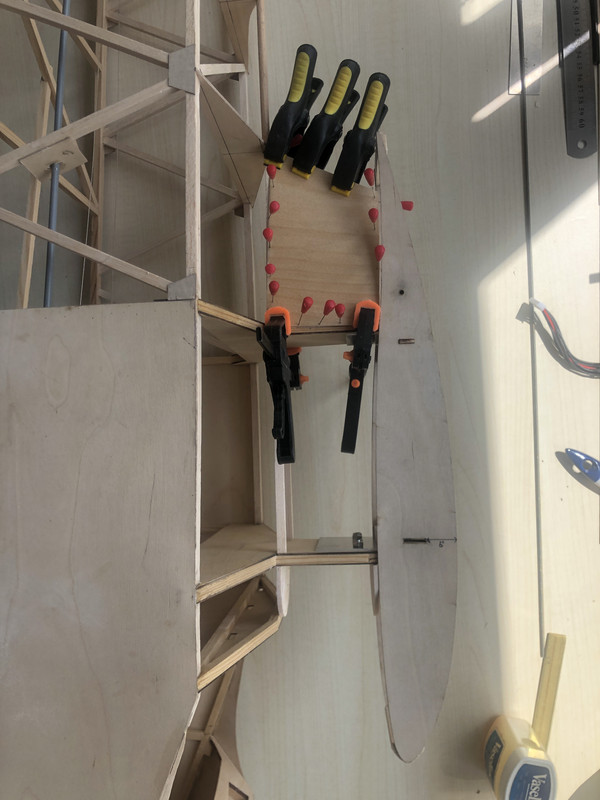
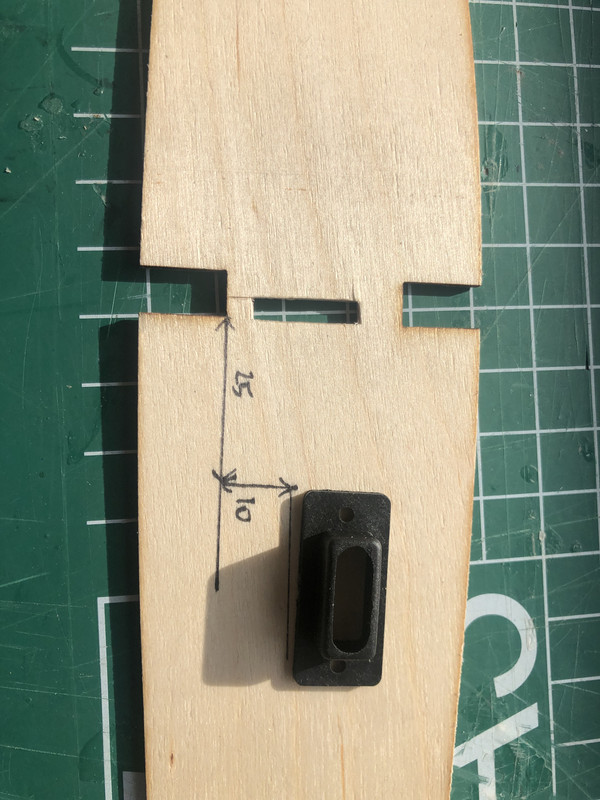
For the first couple of flights I'm planning on having the Sedbergh towed, though I plan on flying it on the slopes. Anyways, I'm building in a tow release.
Since this is my first real build, it is also the first time I've put one of these into a glider.
There the belly of the T-21 is rather flat, the easiest way would be to put straight into the nose, though I do not like the looks of it..
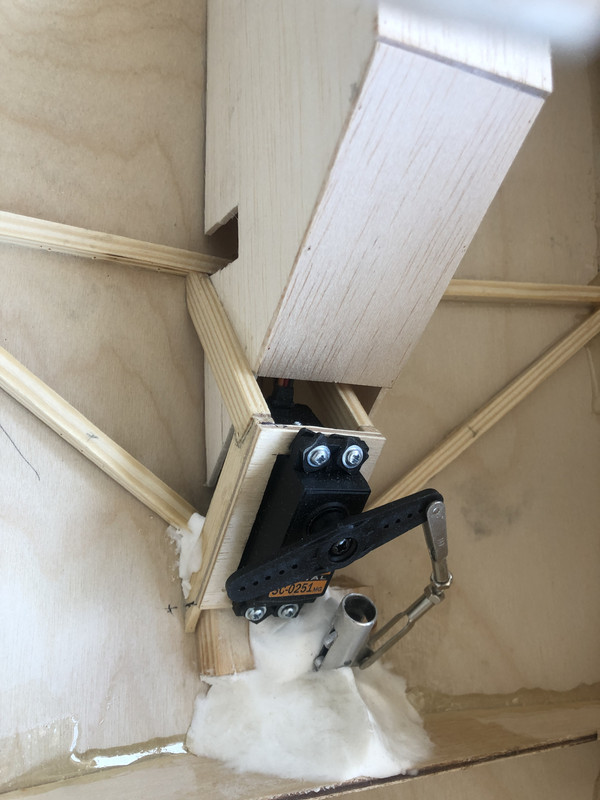
The fix the installation I mixed so fiber with epoxy. There whole thing is rock hard, so hopefully strong enough..

Now I'm left wondering if the ff needs more structural strenghtening? Looking at builds of the 1/3d version, I see a whole lot more wood goes into the nose..
Re: 1/4 scale T-21 CW
Posted: 11 Nov 2020, 20:49
by SedB
Re: 1/4 scale T-21 CW
Posted: 16 Nov 2020, 13:16
by SedB
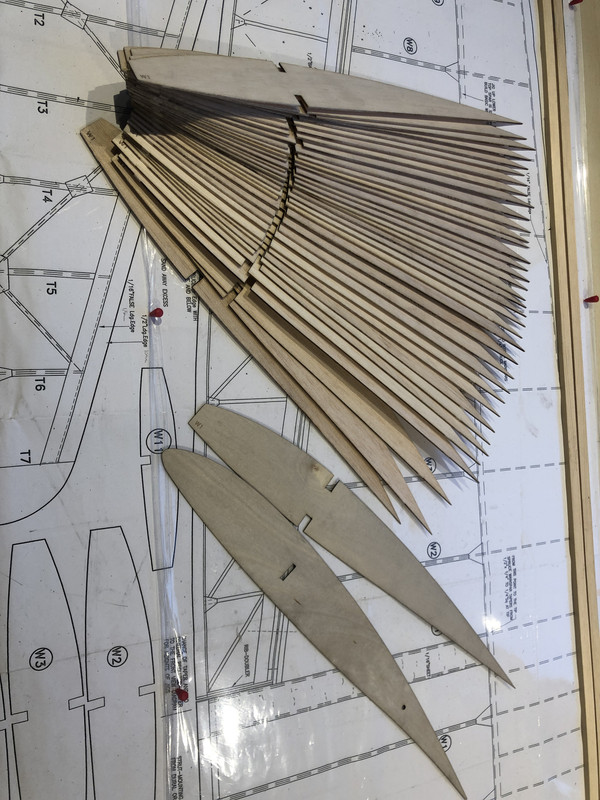
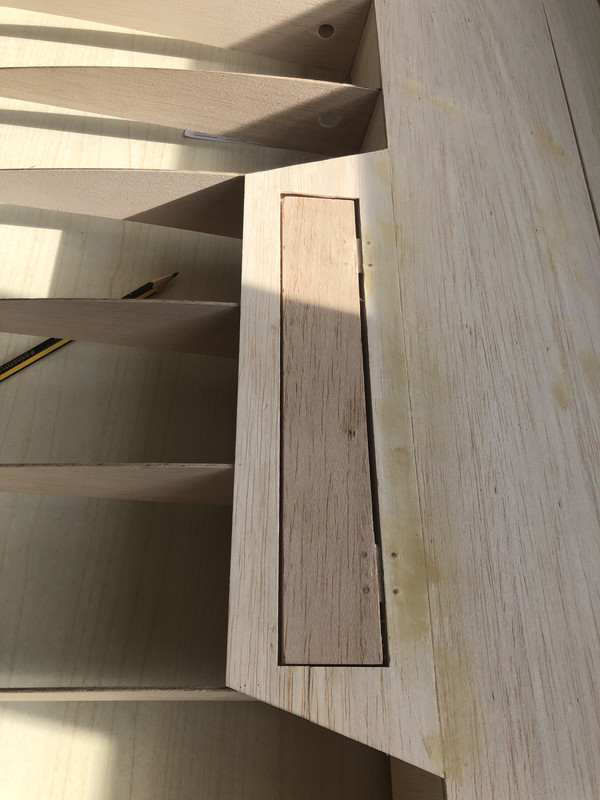
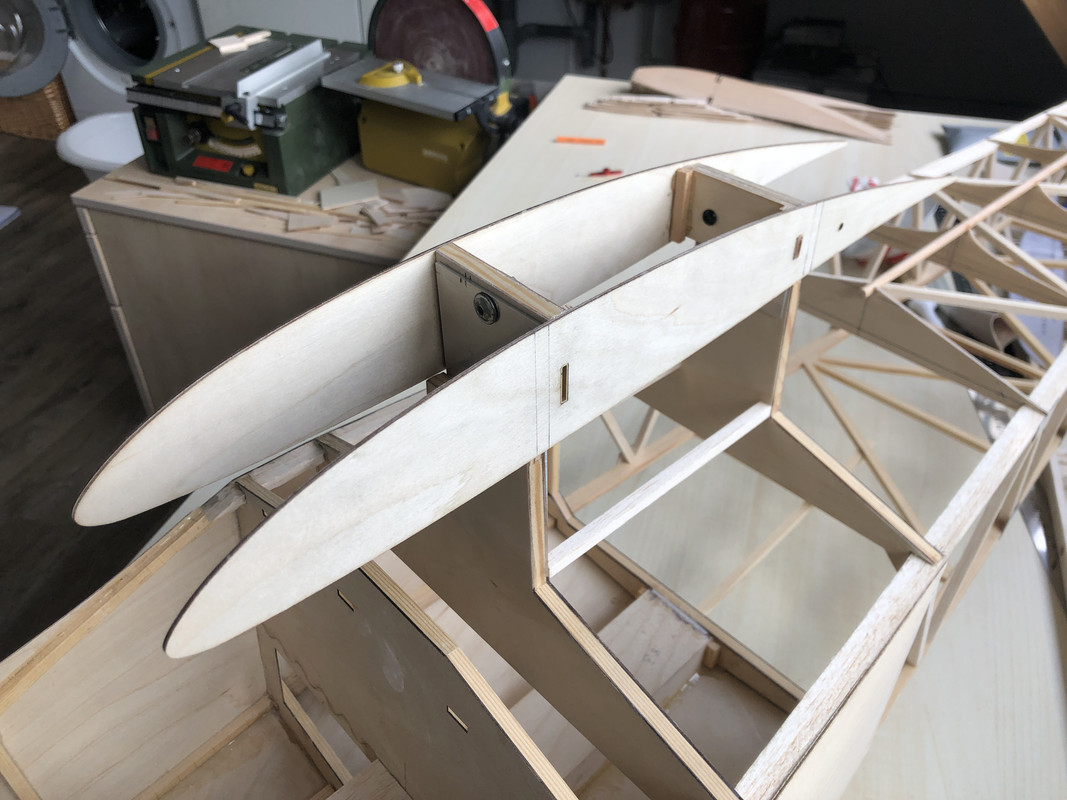
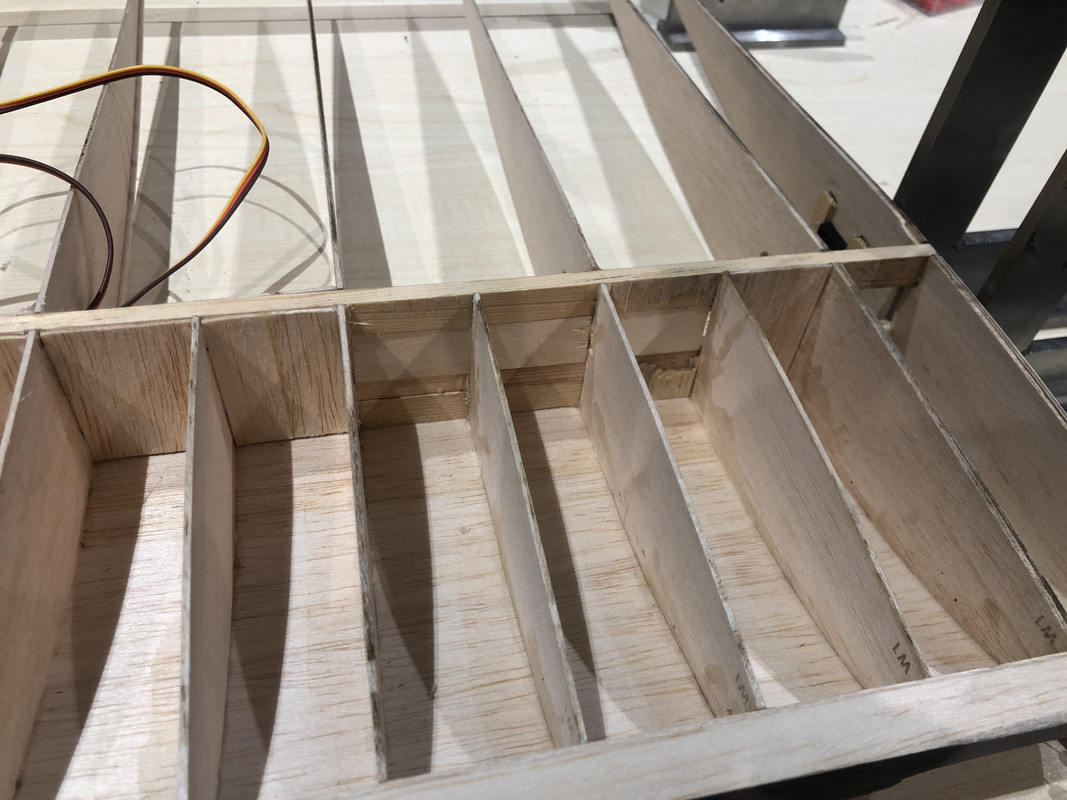
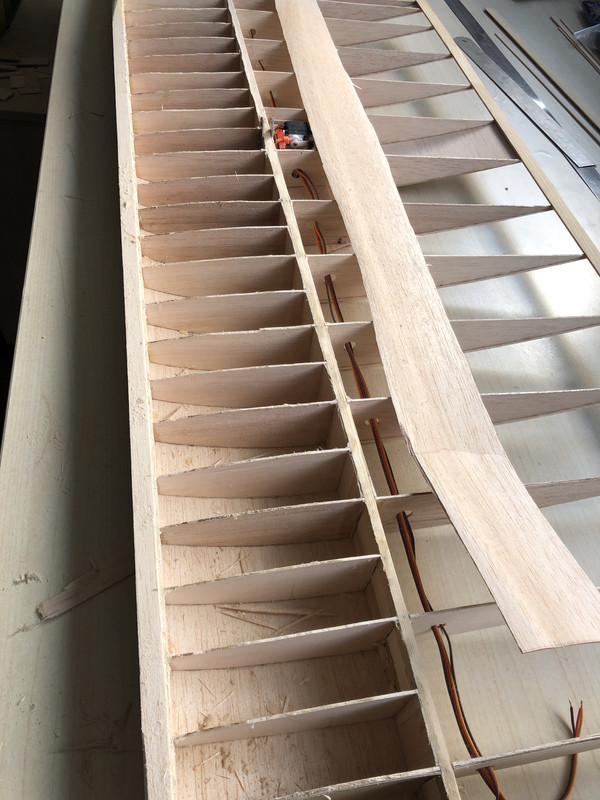
I started the right wing, skipping the first rib as per guidance. This to allow alignment of the joiner box later;
Good thing I did not start gluing straight away since I figured quit late i needed holes for wiring.

I experimented on how to make these holes the easiest and neatest. Seems it is close to impossible to dril bigger holes in balsa sheet. Since I did not have a hole puncher I made one out of heating pipe. This still was not perfect, so I put the copper selfmade puncher in a drill, and it worked out quit nice.
WIP:
Re: 1/4 scale T-21 CW
Posted: 04 Dec 2020, 20:58
by SedB
Re: 1/4 scale T-21 CW
Posted: 18 Dec 2020, 15:45
by SedB
Re: 1/4 scale T-21 CW
Posted: 05 Jan 2021, 11:26
by SedB
Re: 1/4 scale T-21 CW
Posted: 08 Jan 2021, 21:29
by SedB
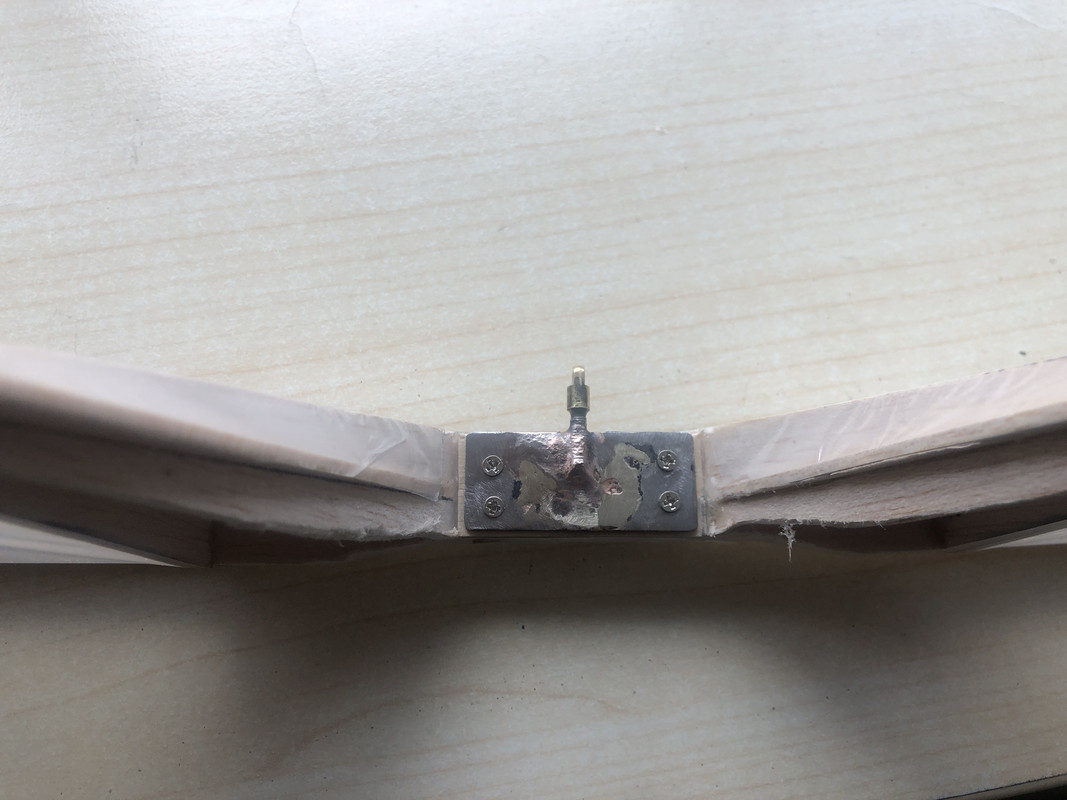
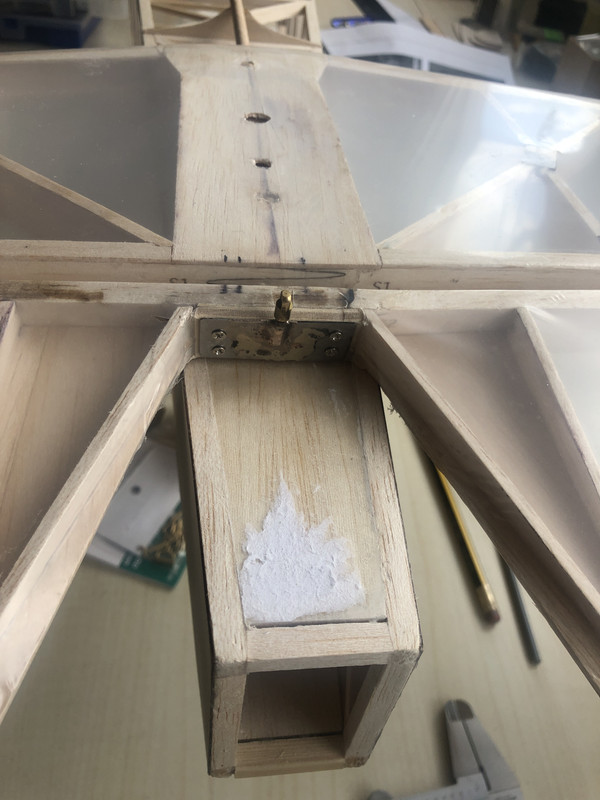
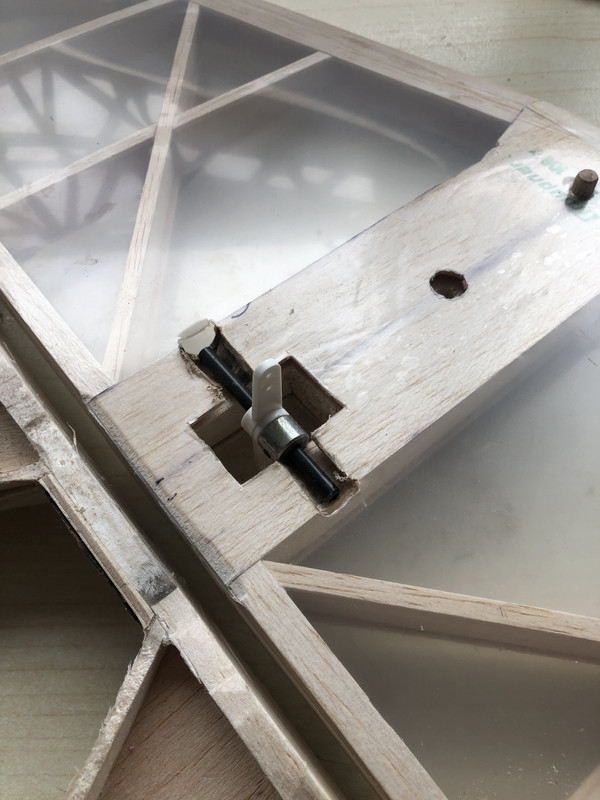
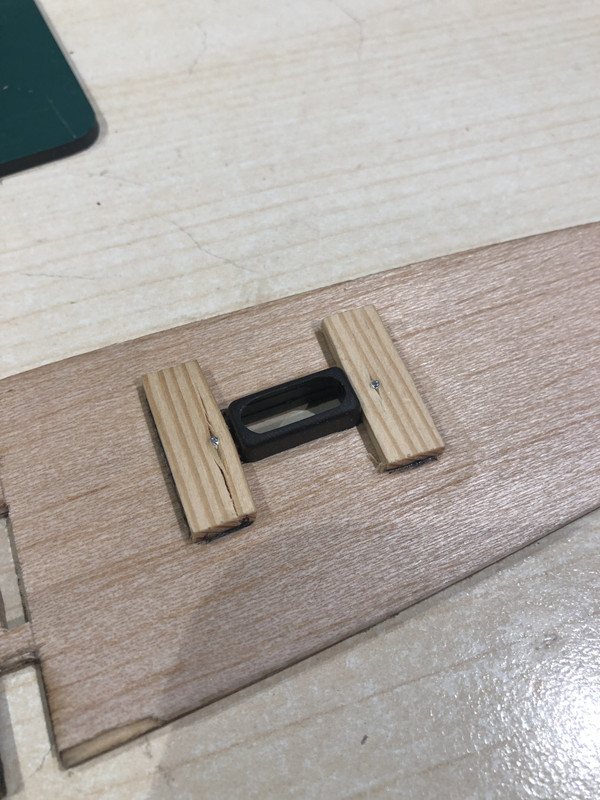
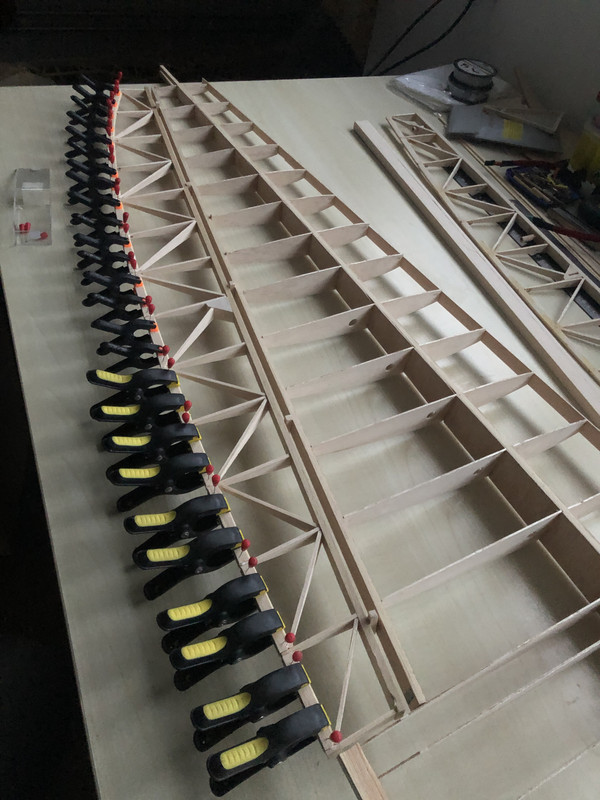
Noting much special here, sheeting the wing root;
Maybe not the best or most beautiful solution, but this will be the way the elevator struts will be connected:
The wing might be to big for MPX connectors, will have to check..
At the moment I'm orientating on colors and paints.
I have figured that the correct RAF trainer colors are:
BS 381C-627 Light Aircraft grey (RAL850-2 or RAL7038)
BS 381C-537 Signal Red (RAL 450-5)
White
So far no problem. What I am stuck on at the moment is which paint to use. The majority of the Glider will be covered with Oratex which for as I've heard is relatively easy to paint.
I've been told that Epifanes Mono Uretane is a really good 1K paint, which should flow out very well. Though they have few colors and use their own color reference. Oracover has it's own paints which I might consider, but I'm open for any good recommendation !
I've been going through multiple build treads to see how other people paint their gliders, but most treads go from a bare frame to a covered glider and a painted glider in only 3 pics

Te fuselage on my glider will be half ply and half covered with foil. What I wonder is how to deal with the change in surface, going from film (aft) to the ply (front) part. Should I primer/basecoat both to make both surfaces more even? Should I slightly sand the transition from film to ply?
Any recommendations are more than welcome!!
Re: 1/4 scale T-21 CW
Posted: 14 Jan 2021, 21:40
by SedB
Re: 1/4 scale T-21 CW
Posted: 17 Jan 2021, 18:52
by SedB
Not sure why I moistened the planking after I glued them, but for sure it was the last time
All I could do was strip them and start over again..
A couple of pins were needed ti fit the new sheeting into position..
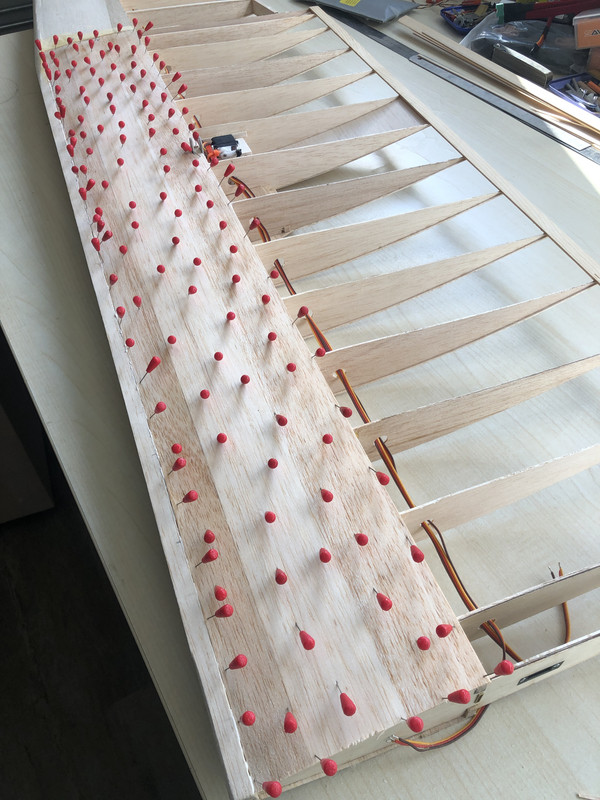
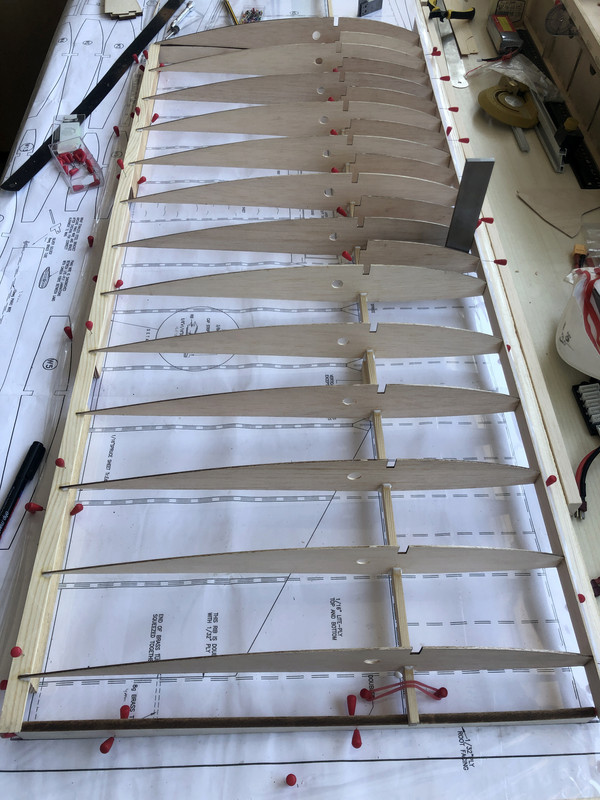
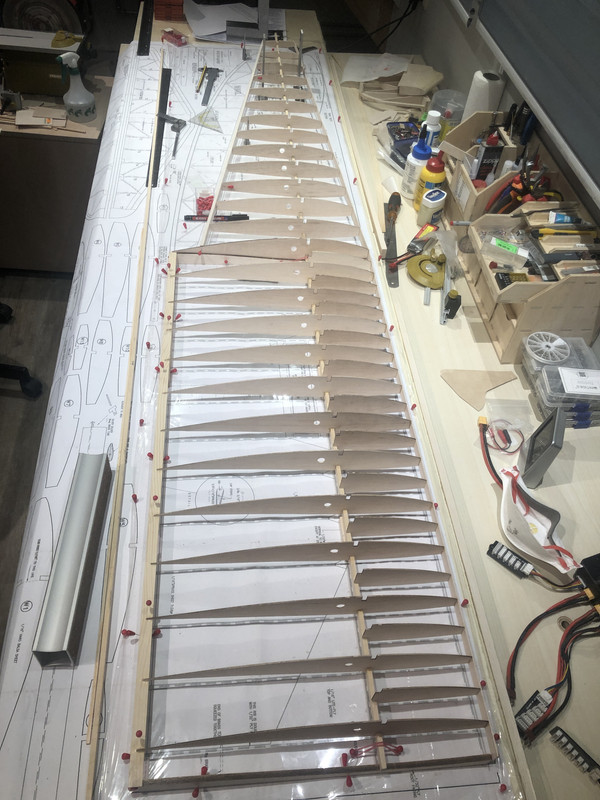
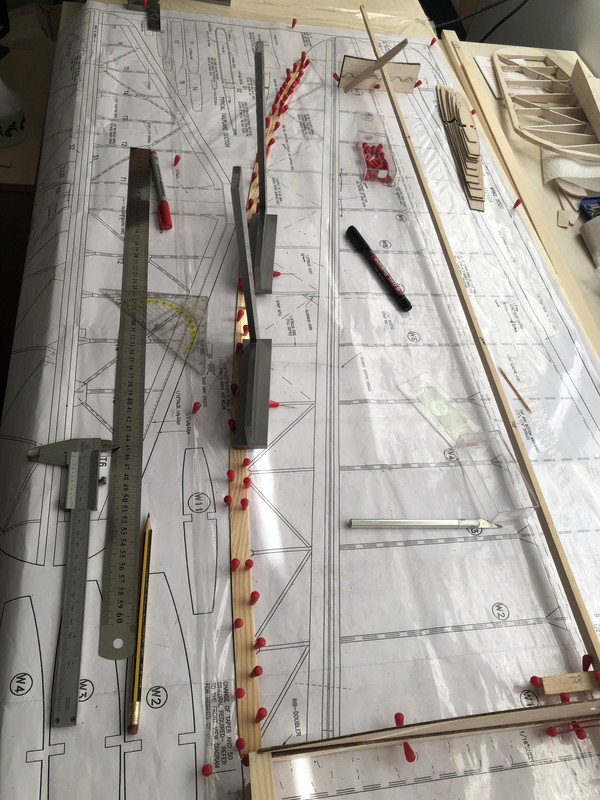
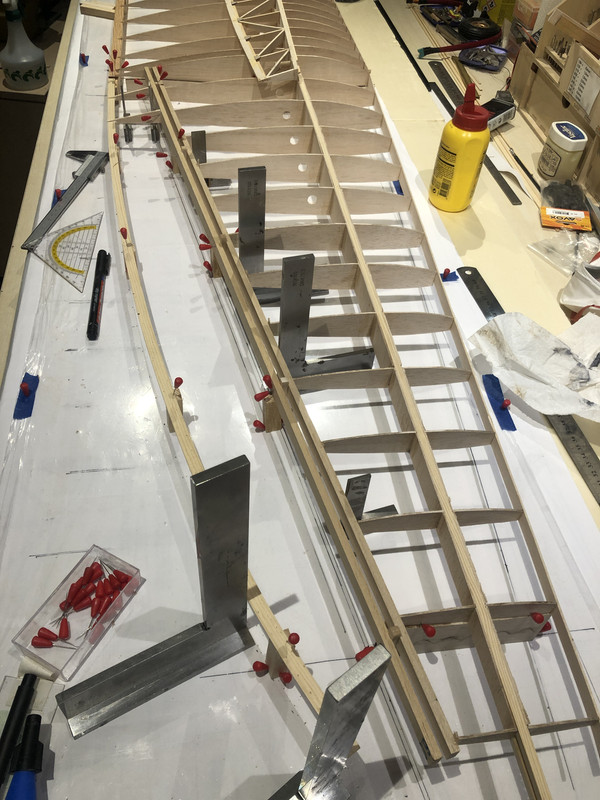
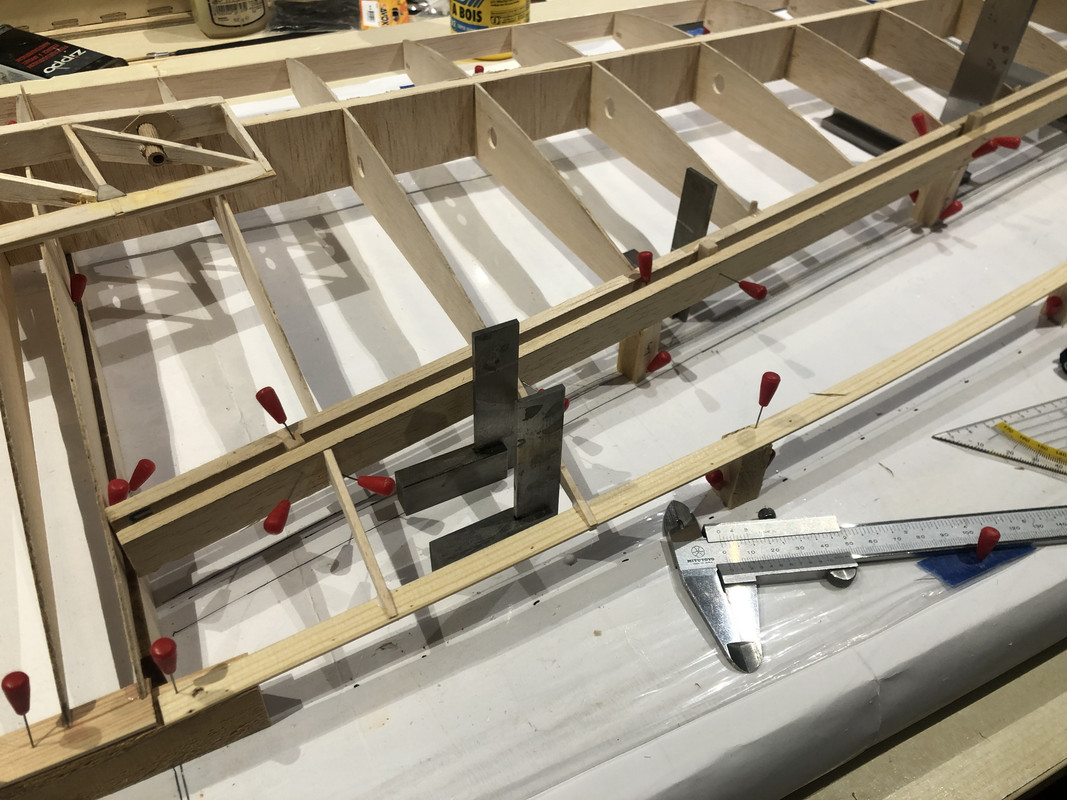
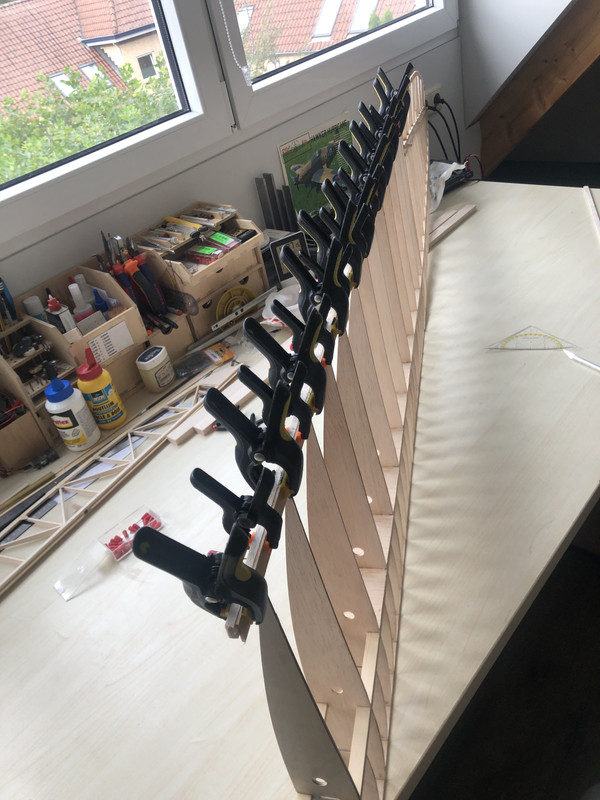
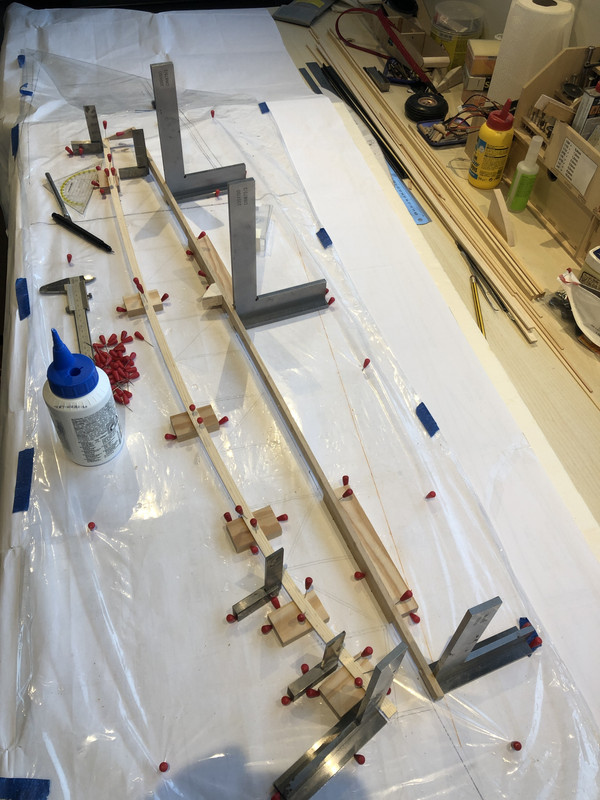
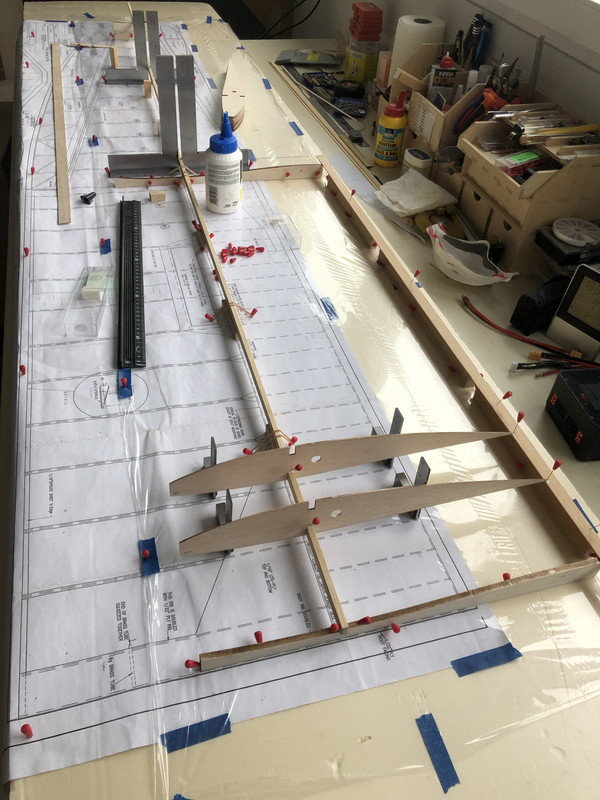
Now with this done and dry, it's time to start the alignment of the left wing. I tried to make a paper copy, but this came out just slightly to big and thus not usable. I did not want to oil the plan, nor use carbon paper. So, just mould the other way around on the same plan..
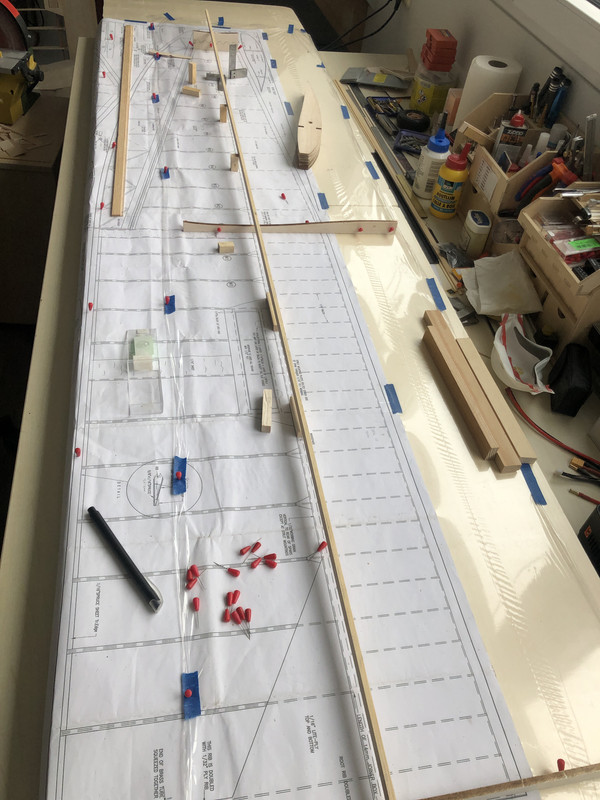
Some more aligning before using glue;
Re: 1/4 scale T-21 CW
Posted: 17 Jan 2021, 19:44
by chris williams
Uncovered balsa-sheeted wings are very susceptible to the damp and best kept dry...! Not sure why you're sheeting the wing in strips of balsa sheet rather that the widest possible sheet available (4" usually)?
Also, if you turn the plan over, you should be able to faintly see the lines on the other side. You don't need to re-draw the entire thing, just draw over the salient points: TE, spar and rib positions etc.
Re: 1/4 scale T-21 CW
Posted: 18 Jan 2021, 09:43
by SedB
Thanks, I will flip the plan over! Indeed this is not the easiest way!
Believe it or not, the sheeting is out of one piece. With the end of Graupner, here it was also the end of good quality balsa. The piece you see was quit flexible in the middle.. I am ordering balsa from TopmodelCZ now, I hope they run a better quality!
Re: 1/4 scale T-21 CW
Posted: 18 Jan 2021, 10:40
by Peter Balcombe
chris williams wrote: ↑17 Jan 2021, 19:44
Uncovered balsa-sheeted wings are very susceptible to the damp and best kept dry...! Not sure why you're sheeting the wing in strips of balsa sheet rather that the widest possible sheet available (4" usually)?
Vincent,
As Chris mentions, I find it best to glue whole 4” sheets together to make a balsa sheet as wide as the wing, then splice lengths together to make a sheet the size of the complete panel & glue on as a single piece.
It’s best to use Aliphatic glue to join sheets as this dries hard & allows you to easily sand back the joints and give a nice smooth sheet to fit. Cyano will be too hard to sand easily & PVA glue leaves a rubbery surface which is hard to sand cleanly.
A good way of joining sheets is to butt joint the long edges (after cleaning up if necessary by us8ng a long straight edge). Tape the sheets together using cheap masking tape, then turn over & use the tape as a hinge to open the joint 180 degrees & apply a smear of glue along the length. Fold back & place flat with tape on underside so that excess glue comes out on top side. Wipe off excess glue & apply a bit more masking tape & weights to hold sheets flat whilst glue dries fully.
Make up sheets to required width & then splice the resultant wide sheets end to end to get the required length by overlapping the sheets by say 50mm. With the overlapped sheets taped together to prevent movement, cut a zig-zag line right through both sheets together. Once you remove the various triangular pieces, you will find that the two zig-zag ends should mate perfectly. Glue this joint to fix the sheets together, again using tape to temporarily hold the sheets together whilst the glue dries.
Sand the joints & sheets on a flat surface to give a good surface all over - it is much better to do this before fitting the sheet to the wing as the sheet can be fully supported whilst sanding.
If you trim the resultant large sheet roughly to the wing planform (allowing for the extra width due wing curvature), you can then fit as a single piece, pinning or taping the LE & TE & using lots of weights (or piles of old magazines) to hold the sheet in contact with the ribs.
Chris has shown this sheet joining technique in build threads long ago.
I use the above technique on all my balsa sheeted wings.
Re: 1/4 scale T-21 CW
Posted: 18 Jan 2021, 16:20
by SedB
Thanks a lot Peter for the clear explanation! It didn't come to my mind to sheet the whole length of the wing at once. I thought doing it in two obvious parts would be the (easiest) way to go. But indeed, doing the whole at once must be much, much stronger.
Till now I used medium ca to join sheets of balsa, and only zig'd or zag'd once, so just made one 45dec cut at the end of the sheet. The technique you mention is new to me and I for sure will give it a try!! Don't be mad if it doesn't reflect in the pics straight away; the build is a bit further ahead as show here. I appreciate all the help I'm getting here a lot, so many thanks!
Dan
Re: 1/4 scale T-21 CW
Posted: 18 Jan 2021, 19:35
by Peter Balcombe
A pleasure Dan (sorry I got the wrong name in my post!)
If you do fit the sheeting in multiple pieces span-wise, then don’t forget to join at a rib and also add additional rib surface thickness doublers to increase support & glueing area at the sheet join.
If the joint is unsupported then it will crack & break through at some point when handled or due to flying loads.
Peter
Re: 1/4 scale T-21 CW
Posted: 18 Jan 2021, 19:55
by chris williams
I drew this plan back in the last century, before I had access to digital photography. However, I do have some build pics if the T46 wing from 20 years ago, if they might be helpful...?
Re: 1/4 scale T-21 CW
Posted: 19 Jan 2021, 08:44
by SedB
Perfect! Thanks a lot!
I should be fine Chris, you already send me the whole folder on the T-21 it self which had been really helpful.
Dan
Re: 1/4 scale T-21 CW
Posted: 19 Jan 2021, 09:43
by chris williams
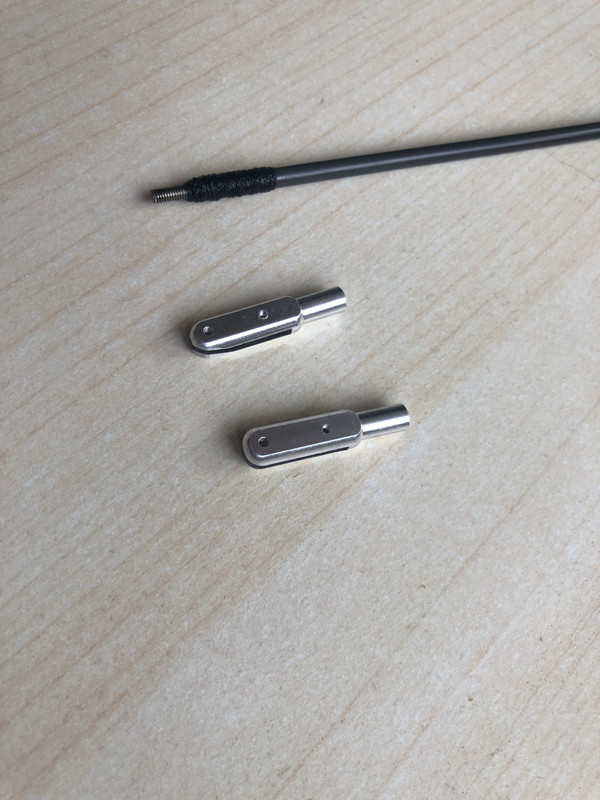
Whilst trawling through memory lane I remembered that at a later stage I modified the T21's struts, using 10mm Ali tube as a core with the ends flattened and drilled out. This became my go-to method for all the later strutted models..
Re: 1/4 scale T-21 CW
Posted: 19 Jan 2021, 13:05
by SedB
Man, why do I do things so complicated
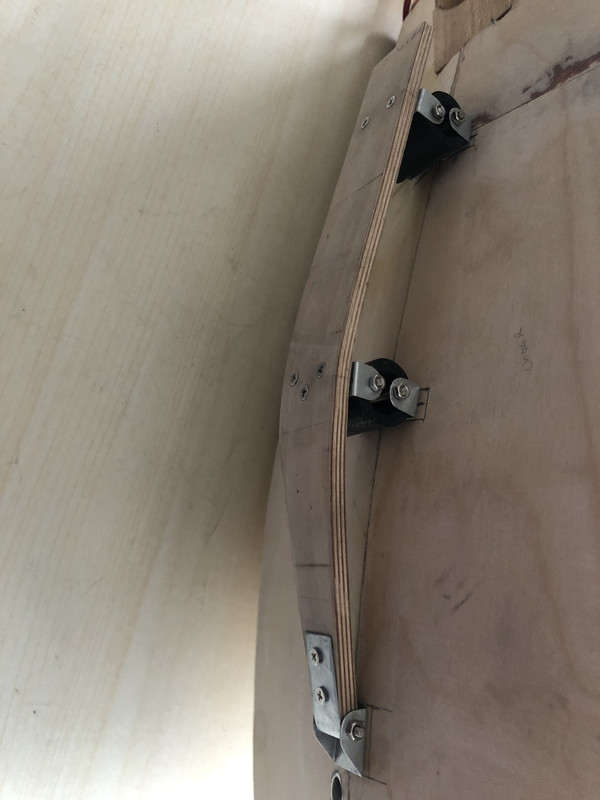
I just finished these, wondering about the best approach..
First I bend some test strips:
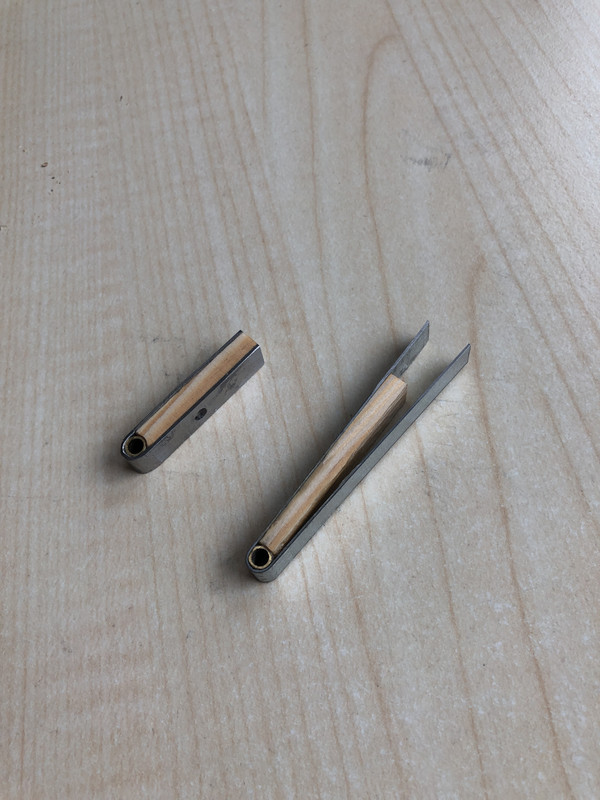
Which later turned out to these:
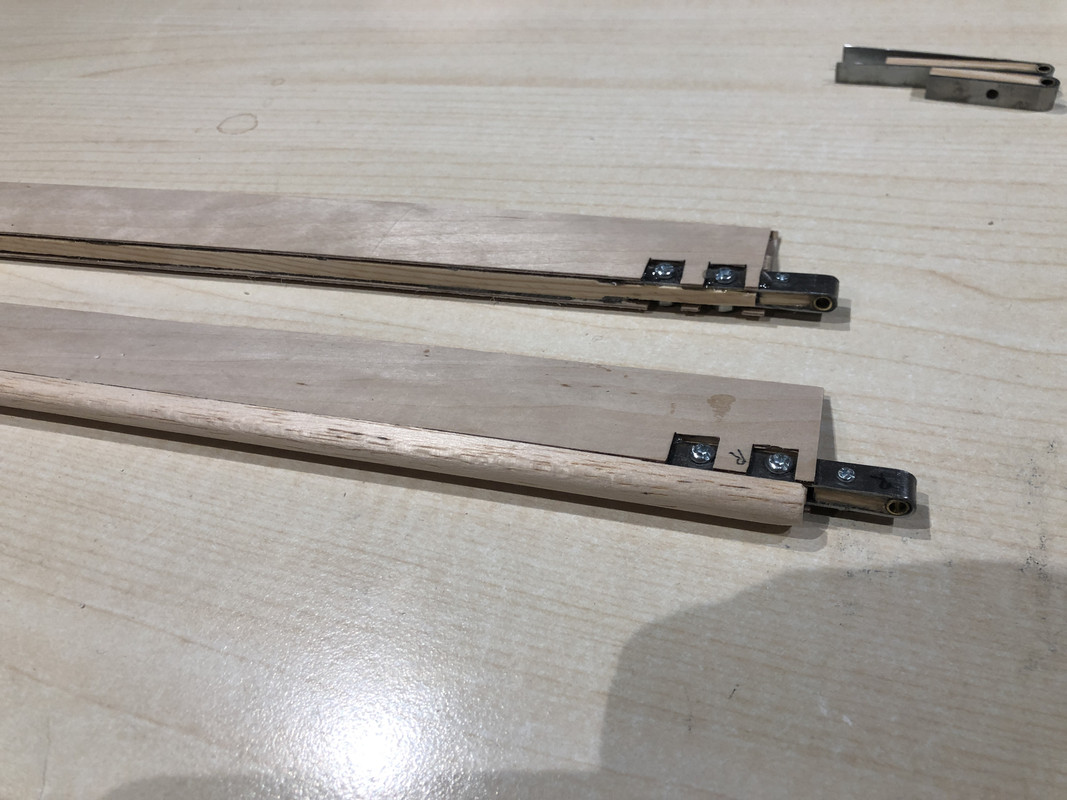
I did reenforce both with a carbon strip, but now I'm considering to make new ones as yes, they look stronger made out of one piece!
Thanks a lot!!
Re: 1/4 scale T-21 CW
Posted: 06 Feb 2021, 18:26
by SedB
Re: 1/4 scale T-21 CW
Posted: 12 Feb 2021, 19:14
by SedB
Re: 1/4 scale T-21 CW
Posted: 05 Apr 2021, 13:43
by SedB
Re: 1/4 scale T-21 CW
Posted: 05 Apr 2021, 20:55
by Max Wright
Just found this thread, Sed. Nice work.

I'm following along.
Cheers